![]()
ZeroTier for Cabinet-to-Cabinet Play
Warning for CHUNITHM
CHUNITHM has stricter network requirements than other SEGA games and needs a specific subnet. In this guide, we will use the subnet 192.168.196.0 as an example. However, to run CHUNITHM, you must change it to the subnet 192.168.139.0. If you don't, cabinets set to "FOLLOW THE STANDARD" will fail to connect. You will also need to adjust the IPv4 Auto-Assign setting of your Zerotier network accordingly by changing 196 to 139.
Installing
Go to the ZeroTier download page. Download and run the Windows installer.
After installation, the program will open automatically in your taskbar.
Joining a network
Connecting to a network
To join a network on ZeroTier, you will need its 16-digit Network ID.
- Start ZeroTier if it's not already running
- Right click on the ZeroTier icon in your taskbar
- Click on "Join New Network"
- Enter the Network ID
- Click on "Join"
That's it!
Checking your connection
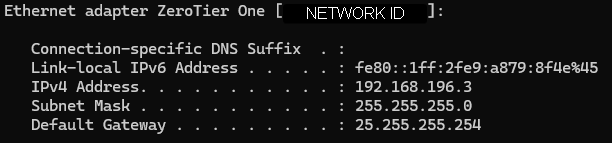
Open your Command Prompt, and run the command ipconfig
Your IP address will appear under Ethernet adapter ZeroTier One [NETWORK ID] next to IPv4 Address
To check if you can successfully reach another computer on the network, run the command ping [IPv4 Address] replacing [IPv4 Address] with the IP address of the other computer, not your own.
Configuration for segatools
Edit segatools.ini with the following content:
[netnev]
enable=1
addrSuffix= The last segment of your ZeroTier IP address (e.g., if your IP is 192.168.196.5, set addrSuffix = 5)

[keychip]
subnet=192.168.196.0

[system]
dipsw1=1 ;Set this to 1 on the host machine and set this to 0 on all others
Each person must have their own keychip
If you play on a remote network, you likely already have your own keychip.
If not, you can use these example keychips: A61E-01D02321145 ; A61E-01A30831145 ; A61E-01E38091145 ; A61E-01E46241145
When starting your game, make sure to allow any Windows Firewall pop-ups (such as for amdaemon.exe, mu3.exe, chusanApp.exe...)
If you didn't see a pop-up
This could mean one of two things.
Either you have already allowed it, and cab-to-cab is working successfully. That's great! No need to change anything.
Or, you denied access, and cab-to-cab isn't working. In that case follow these steps:
- Open the Windows Control Panel
- Click on
System and Security - Click on
Windows Defender Firewall - On the left side, click on
Advanced settings - In the new window, click on
Inbound Rulesand look for your game's executables - Right click on one of them, then click on
Properties - Select
Allow the connectionthen pressOK - Repeat this for all game executables
Alternatively, you can disable your firewall for both public and private networks. Please note that this should only be a temporary measure for testing, as it poses a security risk to your computer.
Configuration for spice2x
- Open
spicecfg.exe - Navigate to the
Developmenttab - Enter your ZeroTier IP in the
Preferred NetAdapter IPfield - Enter
255.255.255.0in thePreferred NetAdapter Subnetfield
Creating a network
- Go to my.zerotier.com and create an account
- Create a network
- Click on its name in the list to configure it
About your Network ID
Your Network ID is displayed on your account's homepage, and in the configuration menu.
This allows you and others to join your network.
If your network is set to Public then anyone with it can join it. Treat it like a password.
Network configuration
Following tabs correspond to the ones found in the configuration menu, follow both "Basics" and "Advanced"
Name
Either keep the default random name, or rename it to your liking.
Access Control
- Private: This is the default option and will require you to accept people who want to join your network
- Public: Recommended, anyone with the Network ID can join without authorization
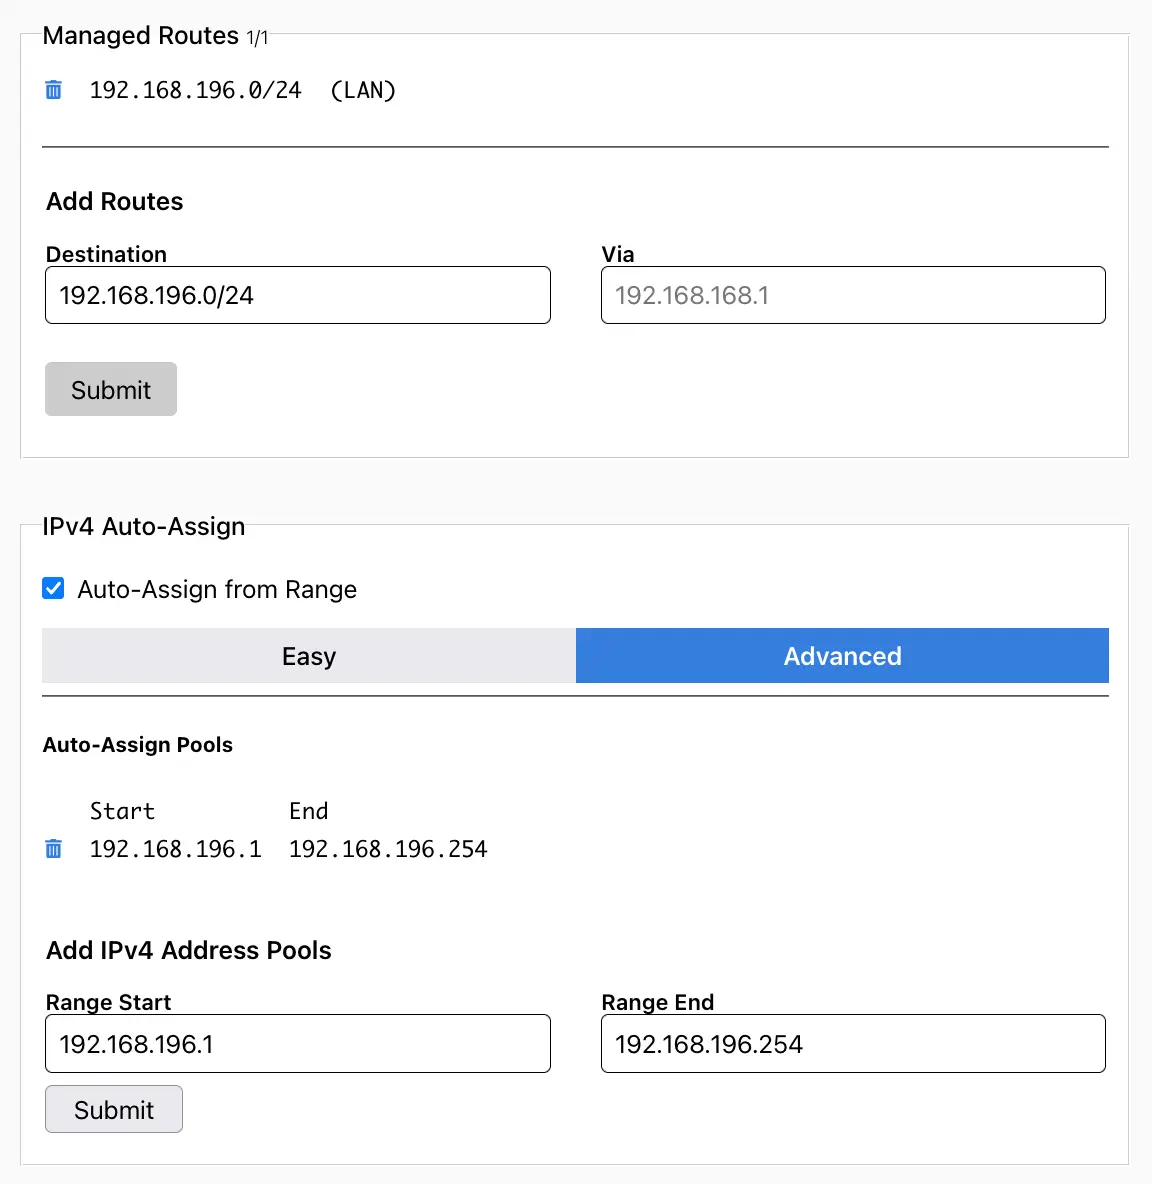
Managed Routes
Delete the already existing entry.
Under "Add Routes", set "Destination" as 192.168.196.0/24 then press "Submit".
IPv4 Auto-Assign
Delete the already existing entry.
Under "Add IPv4 Address Pools" set "Range Start" as 192.168.196.1 and "Range End" as 192.168.196.254 then press "Submit".
You should end up with this: