![]()
Game Setup
This guide is in need of a revision, it is not up to our current standards
The information it provides is still likely good but we can't guarantee it.
TWO-TORIAL is a community-driven project with limited resources.
If you want to help us out, you're more than welcome to contribute!
You must obtain clean, unmodified and complete data to proceed with our guides
Corrupted or incomplete files will cause unpredictable issues we can't cover.
TWO-TORIAL does not provide or distribute game data. Do not ask.
Installing spice2x
If you already have spice2x installed, make sure it is up to date!
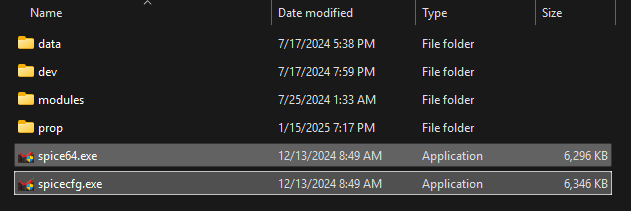
- Head over to spice2x.github.io and download the latest release.
- Extract the
spice64.exeandspicecfg.exefiles from the archive to your game's directory.
General Configuration
Since GITADORA has a separate mode for both Guitar and Drums, the configuration will be split into three sections.
This section will cover the general configuration that is not specific to either mode.
Open spicecfg.exe, each following sub-section corresponds to a tab at the top
Buttons
Click on Bind then press the key you want associated with the action.
With your keyboard, configure your keys for:
- Maintenance:
Test - P1 Keypad:
Keypad 0 to 9, Keypad Insert Card
Cards
Covered in the Connecting to a Network section
Patches
Go through the spice2x Patching page to import patches
To prevent issues, avoid patching things you don't need or understand
Options
Be very careful changing options you don't understand as it may cause issues
Required
| Category | Option | Parameter | Setting |
|---|---|---|---|
| Game Options | GitaDora Two Channel Audio | -2ch | ON |
| Network | EA Service URL | -url | Covered in Connecting to a Network |
Highly Recommended for NVIDIA users ONLY
| Category | Option | Parameter | Setting |
|---|---|---|---|
| Graphics (Common) | NVIDIA profile optimization | -nvprofile | ON |
GuitarFreaks Configuration
This section will cover the configuration specific to the Guitar mode.
If you are wanting to configure drums, skip to the DrumMania Configuration section.
Buttons
Set up your guitar as right-handed. Lefty mode is software-based
Click on Bind then press the key you want associated with the action.
With your keyboard and controller plugged in, configure your keys for:
- Guitar P1 IO Panel:
Guitar P1 Start, Up, Down, Left, Right, Help - Guitar P1 Controls:
Guitar P1 Pick Up, Pick Down, R, G, B, Y, P
Analogs
Rather than setting your Wail to buttons, you should:
- Find the Guitar P1 Wail X, Y, and Z analogs.
- Click
Bind. - In
Device, pick your guitar. - In
Control, pick the corresponding axis. - Move your guitar and ensure the Preview visualizer shows movement.
- Repeat for other applicable axes your guitar has.
Advanced
Not setting these values will cause the game to not boot into either mode
Required
| Category | Option | Parameter | Setting |
|---|---|---|---|
| Paths | Path to ea3-config.xml | -e | prop/ea3-config2.xml |
| Paths | Path to avs-config.xml | -v | prop/avs-config-jb.xml |
DrumMania Configuration
This section will cover the configuration specific to the Drums mode.
If you are wanting to configure guitar, refer to the GuitarFreaks Configuration section.
Buttons
Click on Bind then press the key you want associated with the action.
With your keyboard and controller plugged in, configure your keys for:
- Drum IO Panel:
Drum Start, Up, Down, Left, Right, Help - Drum Controls:
Drum Hi-Hat, Snare, Hi-Tom, Low-Tom, Right Cymbal, Bass Pedal, Left Cytmbal, Left Pedal, Floor Tom
Advanced
Not setting these values will cause the game to not boot into either mode
Required
| Category | Option | Parameter | Setting |
|---|---|---|---|
| Paths | Path to ea3-config.xml | -e | prop/ea3-config.xml |
| Paths | Path to avs-config.xml | -v | prop/avs-config-ja.xml |
Connecting to a Network
Please choose one of the two solutions, not both!
Remote (Online Network)
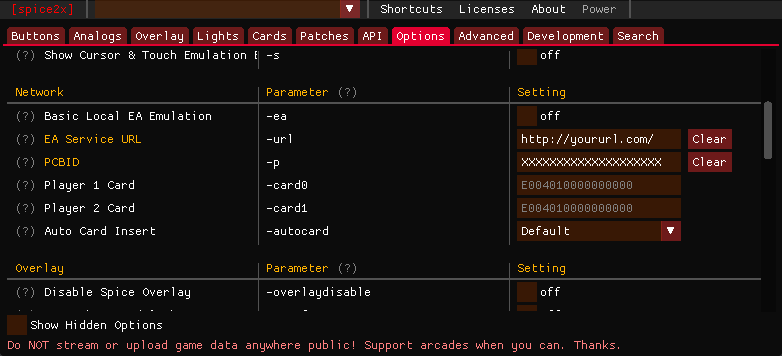
Open spicecfg.exe and head to the Options tab.
In the Network category, set the following settings:
EA Service URLto the URL provided by your network.PCBIDto the PCBID provided by your network.
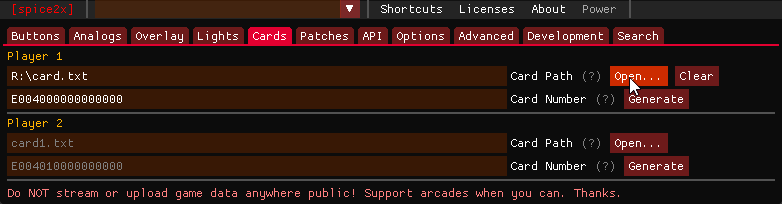
Next you need a card number.
If you don't already have one, generate one in the Cards tab.
To keep your card number safe, create a new .txt file with ONLY it inside.
Once that's done, head to the Cards tab, for Player 1 click Open... and point to your text file.
Local e-amuse Emulator (Asphyxia)
This is covered in the Asphyxia CORE page.
Pre-launch Requirements
These steps are required, otherwise your game won't run
VCRedist & DirectX
- Download and install the latest VCRedist
- Download and install the DirectX End-User Runtimes
Audio
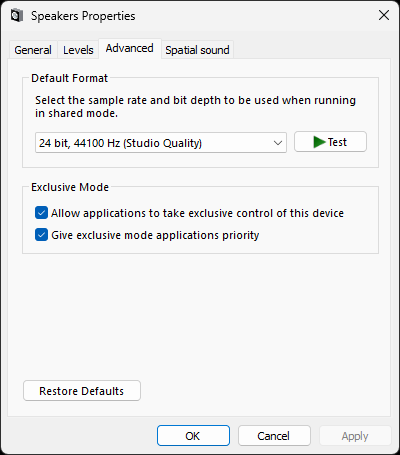
GITADORA FUZZ-UP currently only supports WASAPI exclusive mode
- Open
spicecfg.exe. - At the very top, click on
ShortcutsthenAudio Playback Devices. - In the popup window, right click on your default audio device, and click on
Properties. - Go to the
Advancedtab. - Check both boxes under
Exclusive Mode. - Open the
Default Formatdropdown. - Pick the
24 bit, 44100 Hz (Studio Quality)option and clickApplythenOK.
First Launch
If you have any issues running the game at this point, refer to the Troubleshooting page
If you've followed all instructions correctly, you're finally ready to launch the game!
First, ensure your guitar or drumkit is connected and run spice64.exe. Press Yes when it asks for elevated privileges.
Upon launching your game, you will be greeted with this BACKUP DATA ERROR screen.
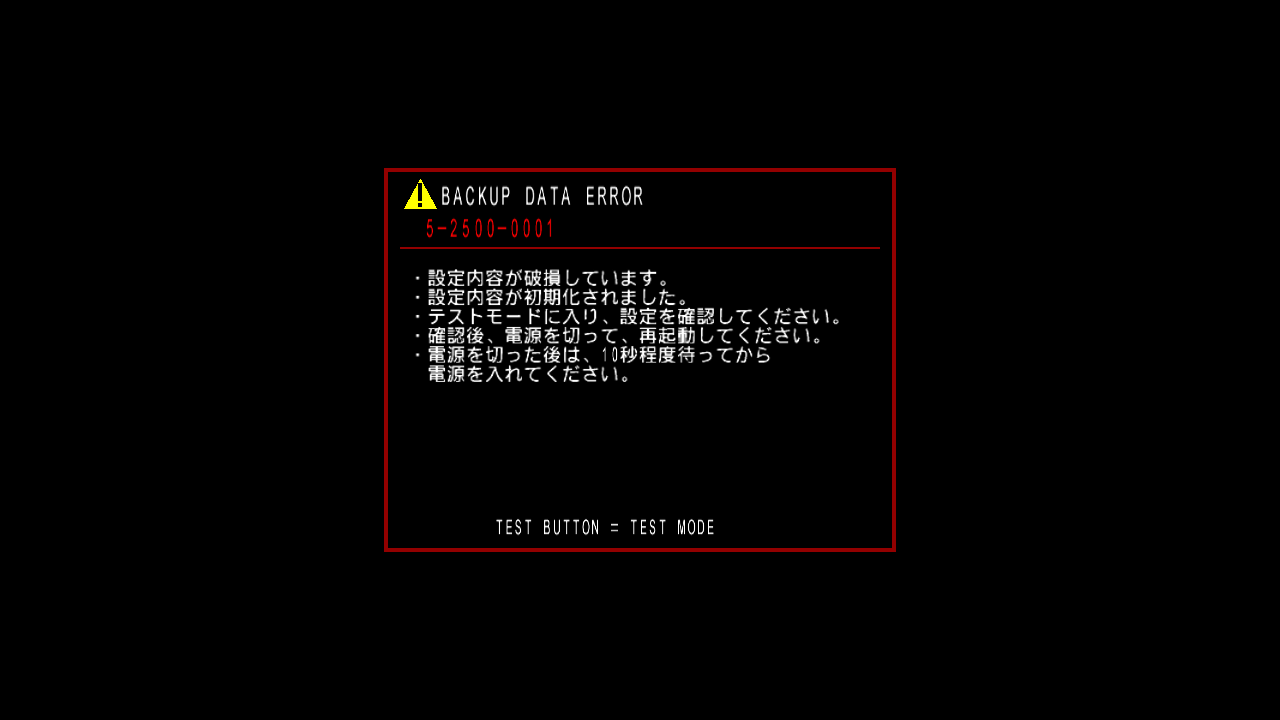
This is normal, simply hit your Test keybind to enter test mode.
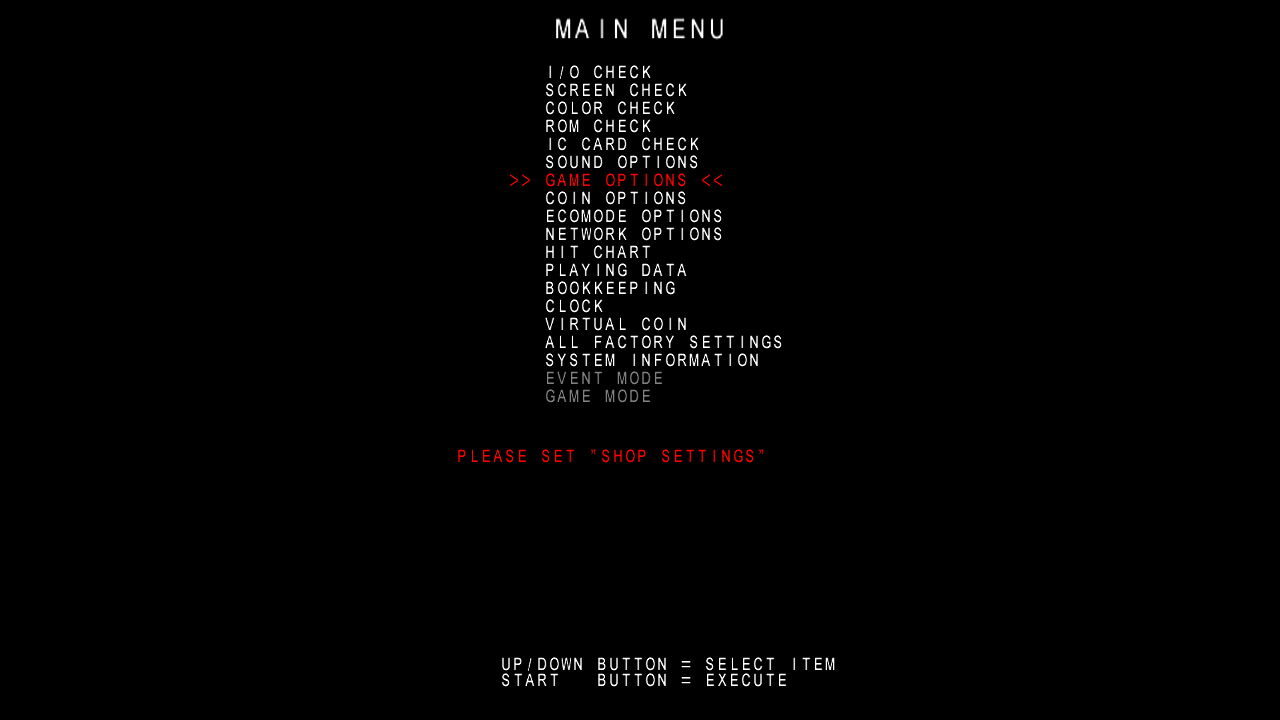
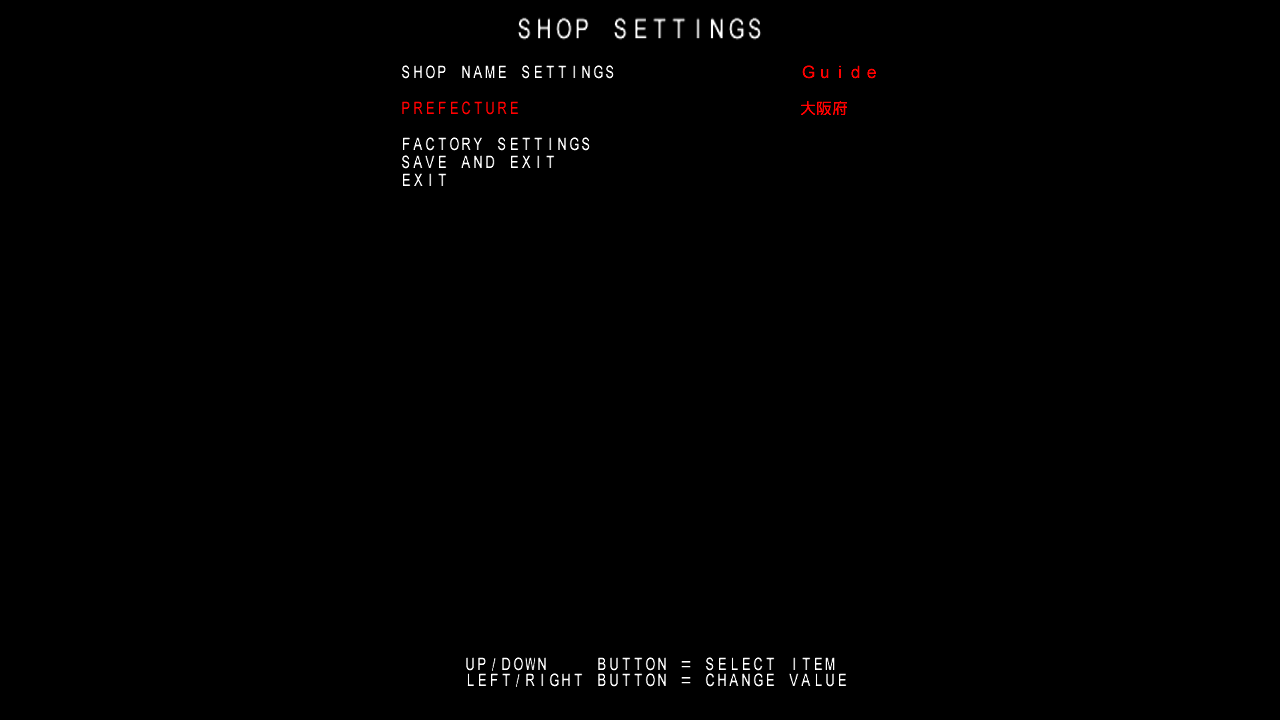
From here, we will need to set a shop name to play, so select the GAME OPTIONS option.
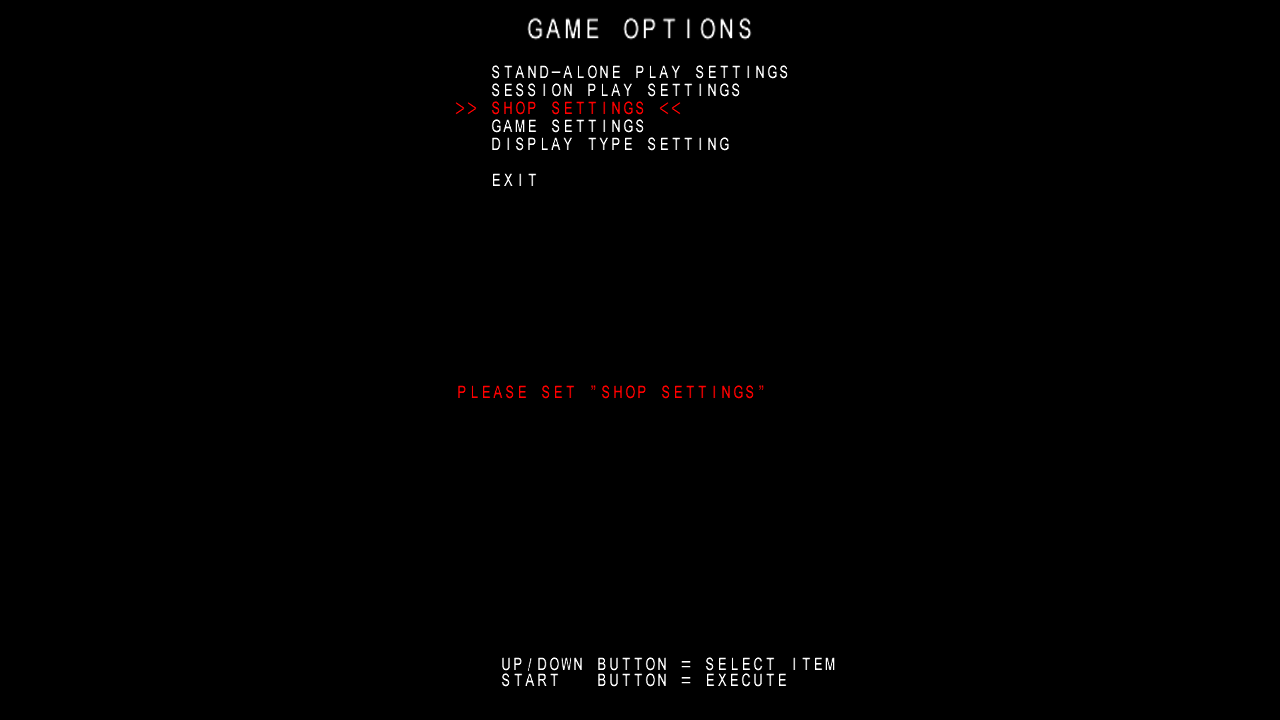
Then, select SHOP SETTINGS.
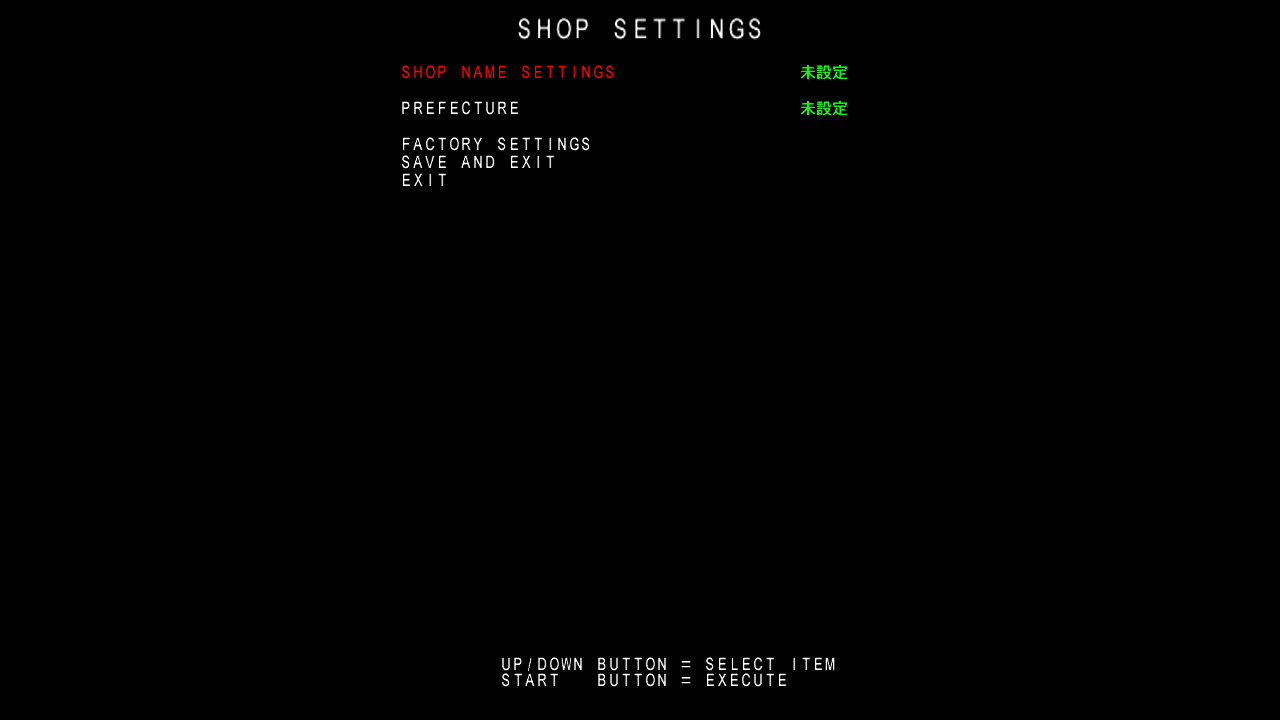
Once inside, select SHOP NAME SETTINGS and name your shop whatever you desire! Once that's done, go down to PREFECTURE and set it to whatever you desire as well. Finally, go to SAVE AND EXIT to get back to the test menu.
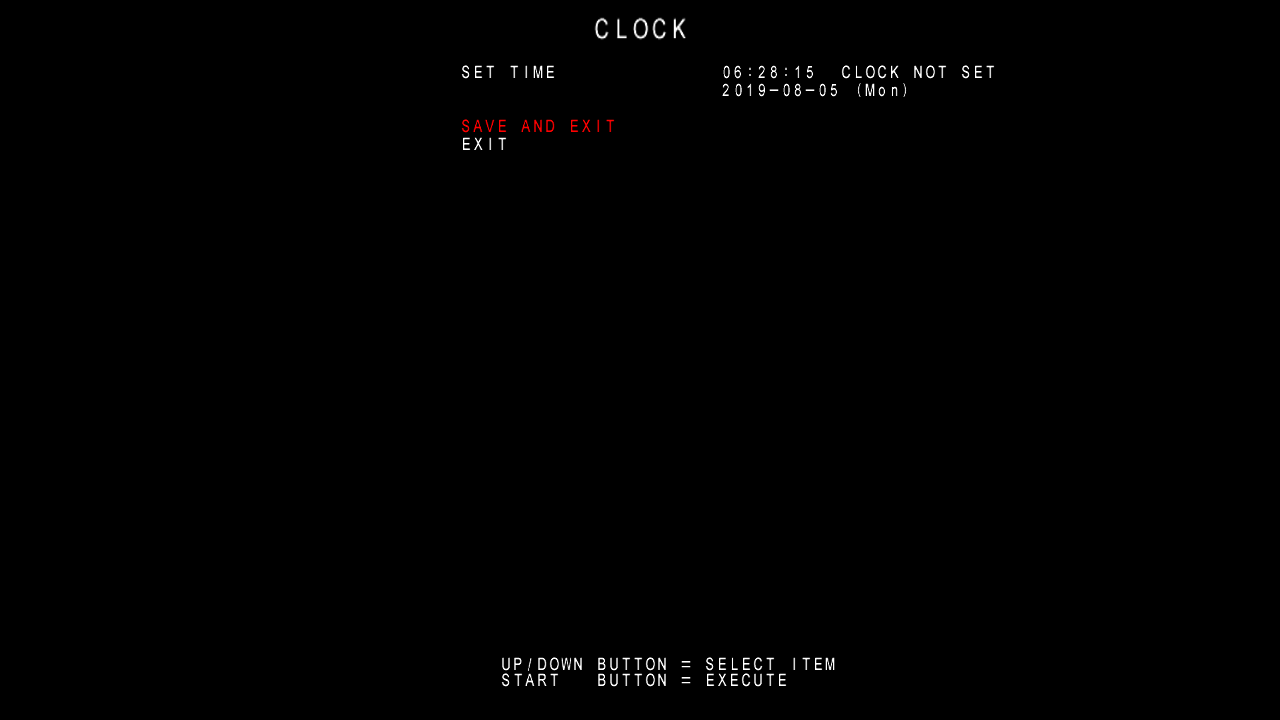
The last menu we'll go inside from the test menu is the clock menu. Go inside CLOCK and simply set the clock by hitting SAVE AND EXIT as pictured below.
You're all done! From the test menu, select GAME MODE and the game should boot up!
Carding In
Once the game is done loading, you need to card in.
- Press your
Keypad Insert Cardbutton. - Enter your code using your keypad binds.
Troubleshooting
Have any other issue?
Check out the Troubleshooting and Error Codes pages.