![]()
Game Setup
This guide is in need of a revision, it is not up to our current standards
The information it provides is still likely good but we can't guarantee it.
TWO-TORIAL is a community-driven project with limited resources.
If you want to help us out, you're more than welcome to contribute!
You must obtain clean, unmodified and complete data to proceed with our guides
Corrupted or incomplete files will cause unpredictable issues we can't cover.
TWO-TORIAL does not provide or distribute game data. Do not ask.
Preparing data
After downloading and extracting your data, we need to make sure your files aren't set to Read-only.
- Right click the folder containing your data, then click on
Properties. - In the
Generaltab go down toAttributes, untickRead-onlyand clickApply. - A popup will appear, select
Apply changes to this folder, subfolder and filesand pressOK. - Finally, click
OKagain to exit out of properties.
Installing Bemanitools
-
Download Bemanitools.
-
Inside
bemanitools-5.48.ziplocateiidx-09-to-12.zip. -
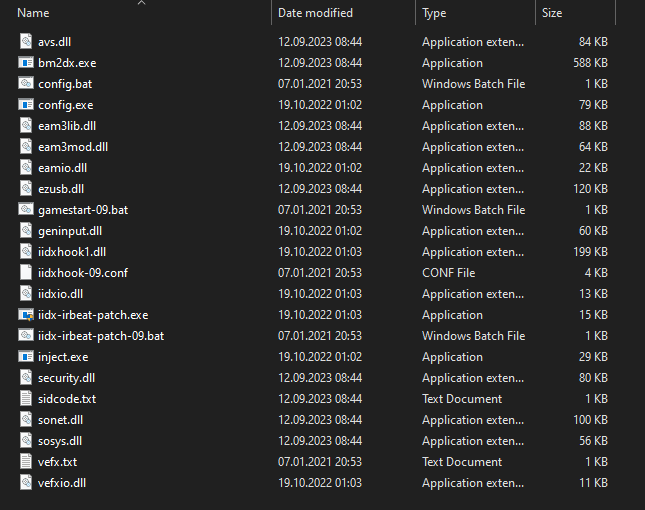
Extract everything inside the folder that contains the
bm2dx.exewhich is located in\C02\D\C02\JAG.
Pictured below is what your folder should look like. We've removed any files not necessary for 9th style.
Using iidxhook-09.conf
-
Download the Bemanitools supplements
-
Open
bemanitools-supplement-v1.6.zipand navigate insidemisc.zip -
Inside
misc\d3d8to9, extractd3d8.dllto\C02\D\C02\JAG.
This enables us to use the graphic options inside iidxhook-09.conf which we will take advantage of.
Configuring Bemanitools
To configure your keybinds, open your config.bat file
Buttons
Double click on the right on a button that you wish to bind, then press the key you want associated with the action.
With your controller and/or keyboard plugged in, configure your keys for:
- Maintenance:
Service, Test - P1 Game buttons:
1 to 7, Start, EFFECT, VEFX - P1 Keypad:
Keypad Insert Card
Only if you're playing using a keyboard:
- Turntable:
TT+, TT-and optionallyTT+/-which alternates betweenTT+andTT-on each press.
Analogs (controller/cab only)
With a controller rather than binding buttons to TT+ and TT-, you need to:
- Head to the
Analogstab at the top. - In
Device, pick your controller. - In
Control, pick whichever one corresponds to the turntable. - Turn your turntable ensuring that the preview turns along with it.
- Click
OK, leaving the rest of the settings alone.
Lights (controller/cab only)
Your controller might support having its lights controlled by the game through bemanitools.
If it does, here's how you may link different actions to your lights:
- In
Device, pick your controller. - In
Game Light, select the corresponding button that will be used for that light. - Repeat for your other lights.
If you'd like to play offline, you can head straight to Game resolution and locking FPS
Configuring Bemanitools for a network
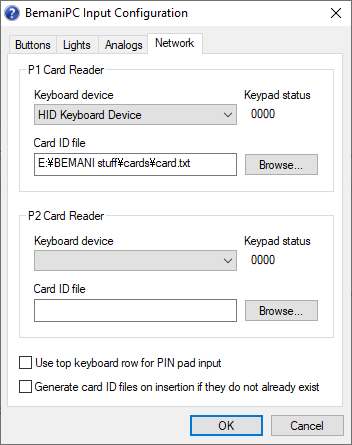
Head over to the Network tab
Now we will set up our PIN pad and card.
- Click on
Keyboard device - You may or may not have more than one option. To figure out which one is your actual keyboard, select a device inside that list and press a button on the numpad.
- Once you have found your correct device, the
Keyboard statuswill change (the number and location of the number does not matter, it only matters that it changed). - Grab your card, create a
.txtand name it however you like. In this example it's calledcard.txt - Place the file in a location that is easily accessible and you won't forget. In this case it's in a seperate folder.
If you don't have a numpad, make sure to tick Use top keyboard row for PIN pad input. This will also change the Card In button to Backspace
Connecting to a network
-
Locate your
iidxhook-09.conf -
Open it with your desired text editor (we're using Notepad++)
-
Replace the
eamuse.server=localhost:80with your desired network URL -
Replace
eamuse.pcbid=XXXXXXXXXXXXXXXXXXXXandeamuse.eamid=XXXXXXXXXXXXXXXXXXXXwith your PCBID of your network of choice.
Game resolution and locking FPS
We'd like to mention that there are two options when it comes to how the game renders. You can choose between Linear and Point.
Below is an example of how both look like.
Linear

Point
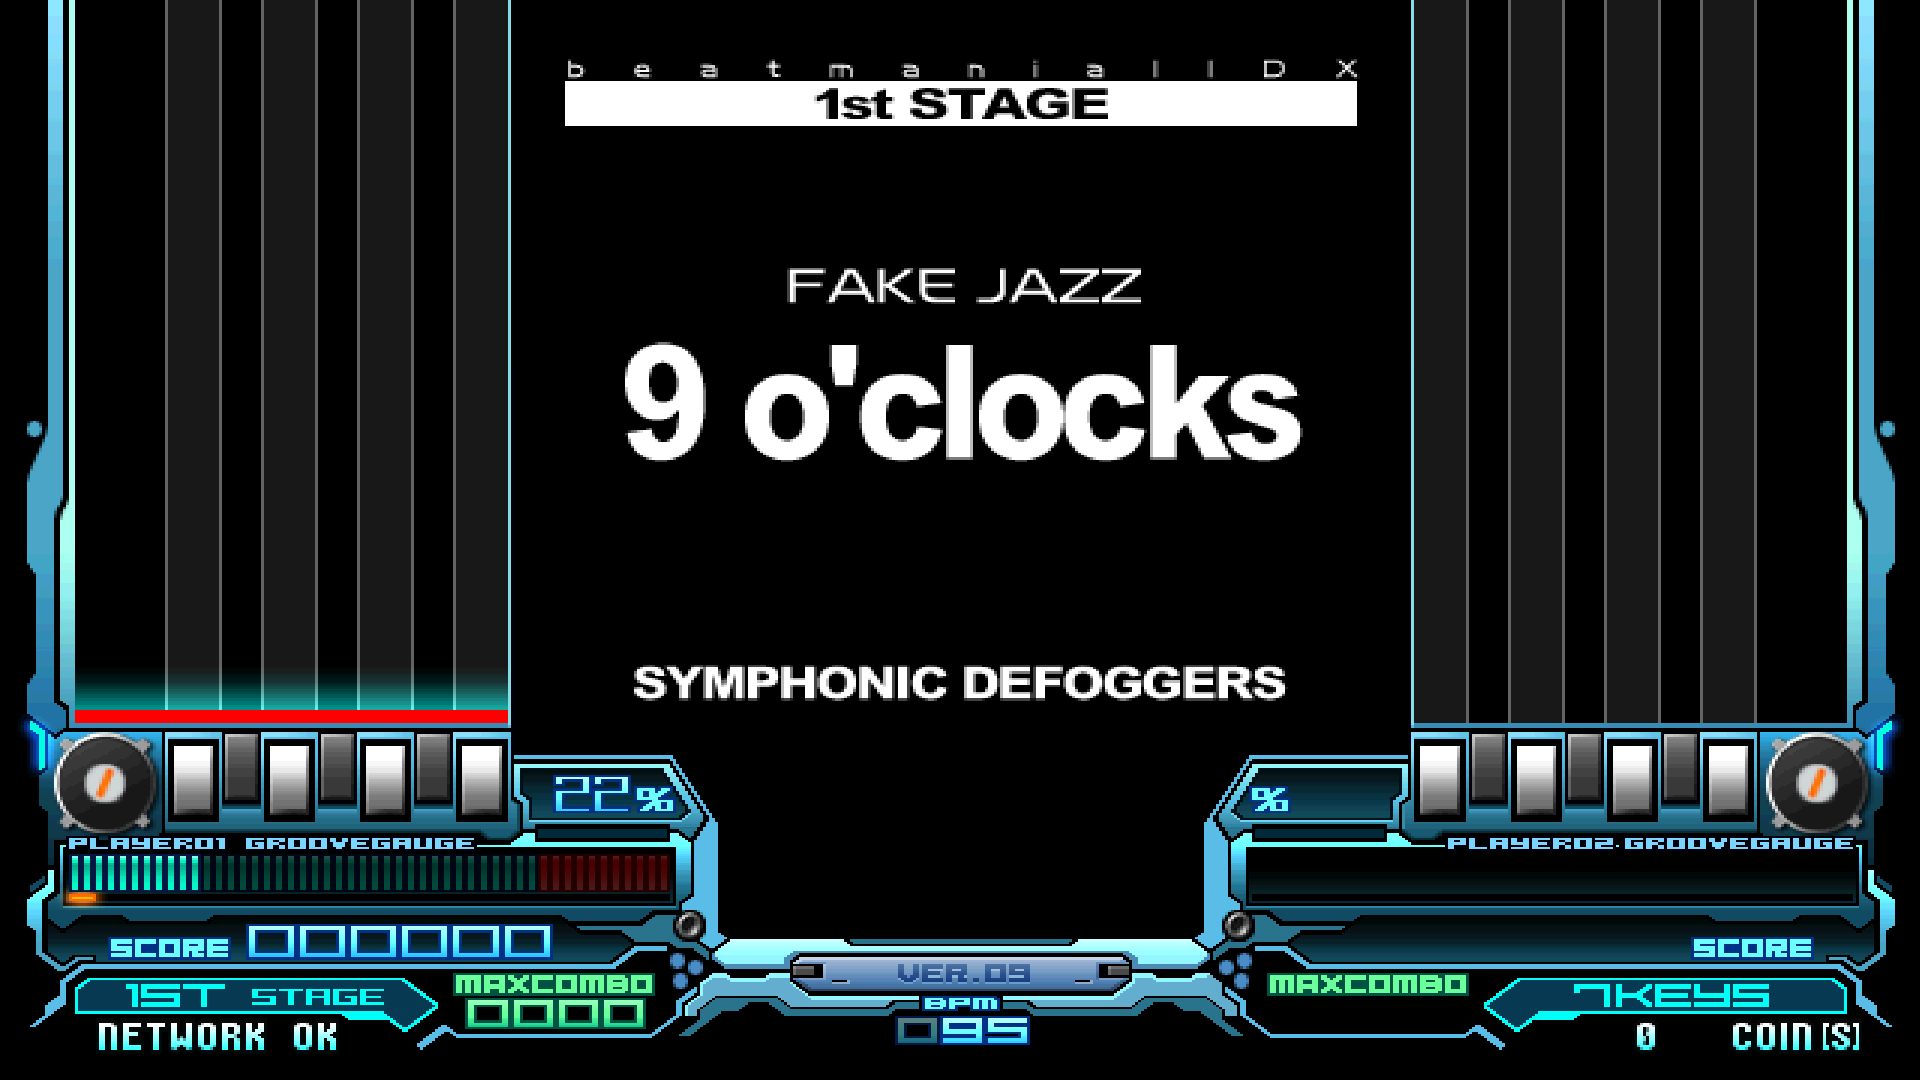
It comes down to your own prefrence what you decide on, Linear is less sharp but doesn't have pixel perfect edges. Point is sharp and is pixel perfect.
Next up, we'll setup borderless window and configure the proper resolution. We're using a 1920x1080 monitor so we will use that.
Repeat the previous step and open your iidxhook-09.conf. We want to find these lines:
# Software limit the frame rate of the rendering loop in hz, e.g. 60 or 59.95 (0.0 = no software limit)
gfx.frame_rate_limit=0.0

# Run the game windowed
gfx.windowed=false

# Windowed width, 0 for default size
gfx.window_width=0

# Windowed height, 0 for default size
gfx.window_height=0

# Up-/downscale the back buffer's width. This does not change the game's rendering resolution but scales the final frame. Use this to target the native resolution of your monitor/TV, e.g. to avoid over-/underscan, bad image quality or latency caused by the monitors internal upscaler. 0 to disable this feature. Must be set in combination with the corresponding height parameter.
gfx.scale_back_buffer_width=0

# Up-/downscale the back buffer's height. This does not change the game's rendering resolution but scales the final frame. Use this to target the native resolution of your monitor/TV, e.g. to avoid over-/underscan, bad image quality or latency caused by the monitors internal upscaler. 0 to disable this feature. Must be set in combination with the corresponding width parameter.
gfx.scale_back_buffer_height=0

# Filter type to use for up-/downscaling the back buffer. Only used if scaling feature was enabled by setting the scaling width and height parameters. Available types: none, linear, point (refer to D3DTEXTUREFILTERTYPE  for explanation).
gfx.scale_back_buffer_filter=none
If you can't seem to find them, press CTRL + F and search for gfx.frame_rate_limit=0.0. This will bring you to the first line we want to edit.
Listed below are the values we want to change them to.
gfx.frame_rate_limit=59.95
gfx.windowed=true
gfx.window_width=1920
gfx.window_height=1080
gfx.scale_back_buffer_width=1920
gfx.scale_back_buffer_height=1080
gfx.scale_back_buffer_filter=linear
gfx.framed=false.
Make sure to decide on whether you want Linear or Point rendering.
First launch
If you have any issues running the game, refer to the Troubleshooting page
CLOCK ERROR
If you've followed all instructions correctly, you're now finally ready to launch the game!
First plug your controller if you have one and run gamestart.bat.
If it's your first time running the game, you'll immediately be greeted with this screen.
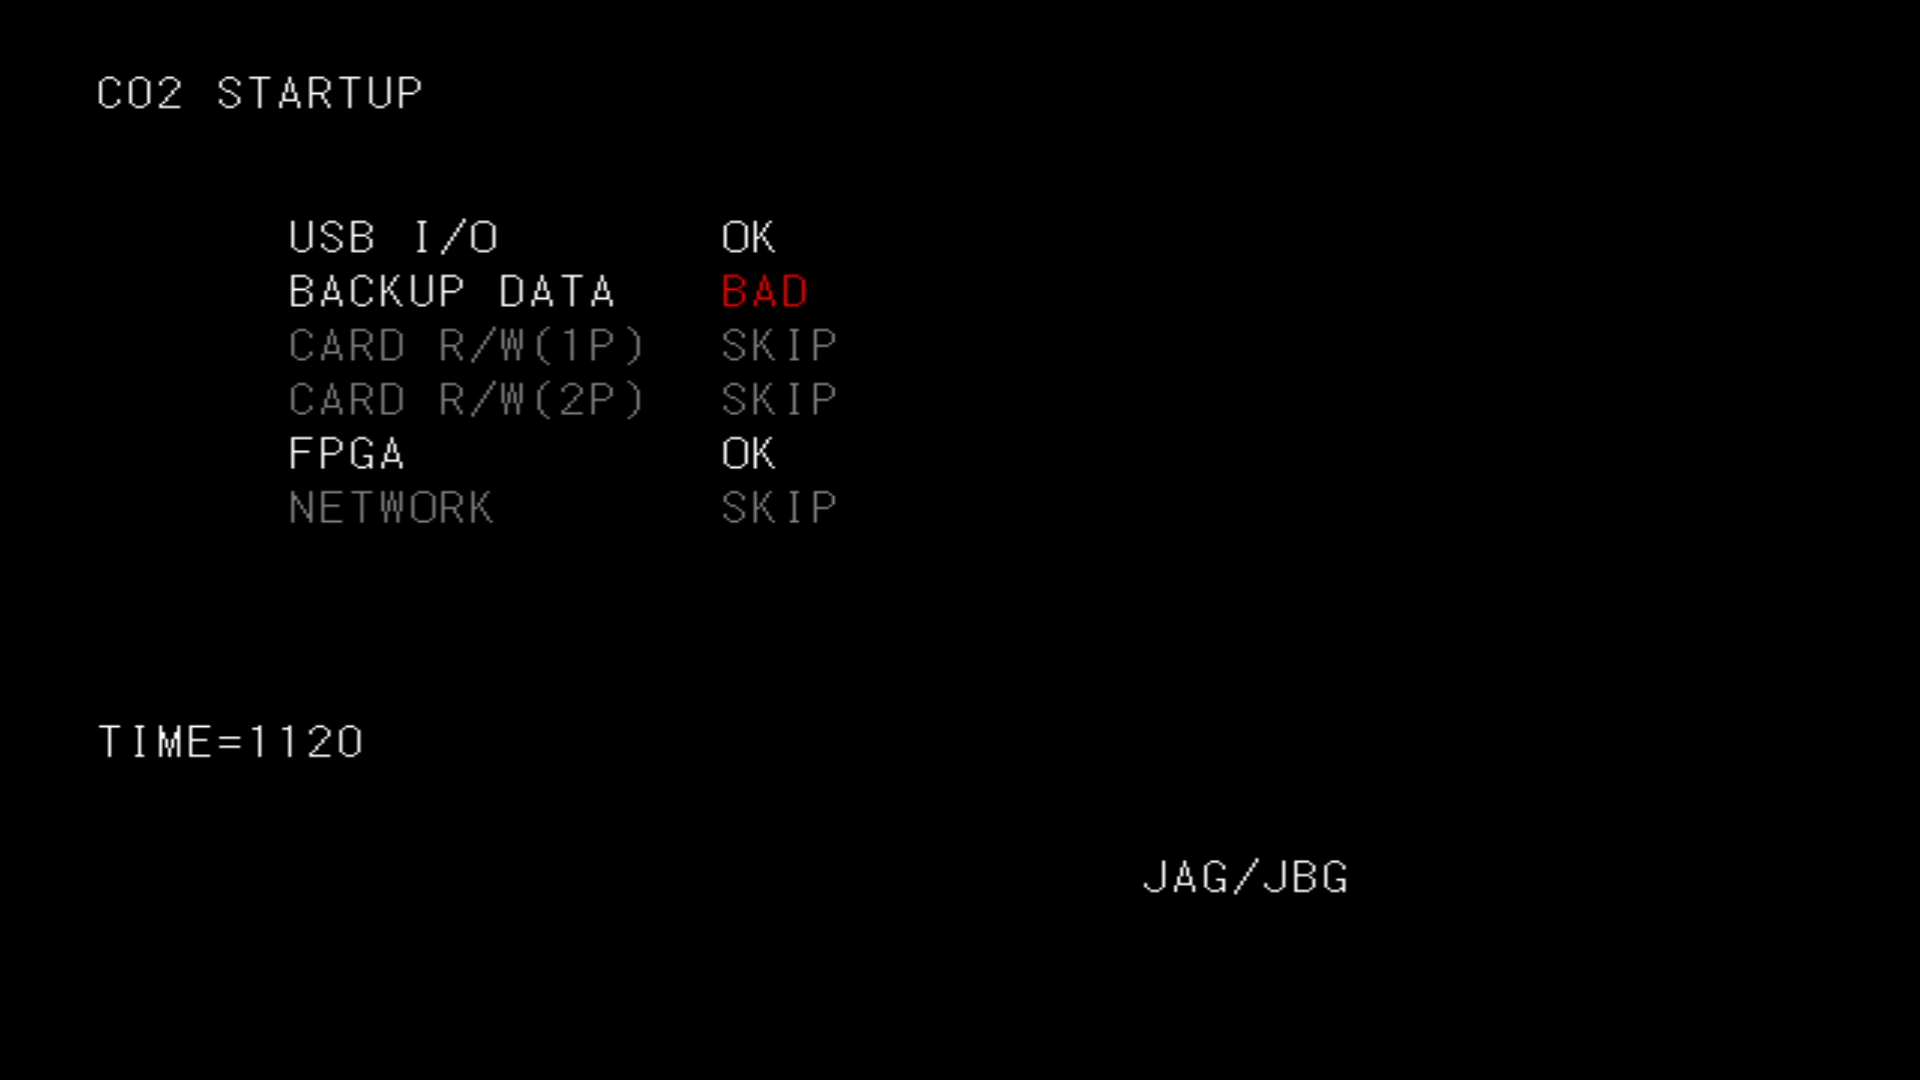
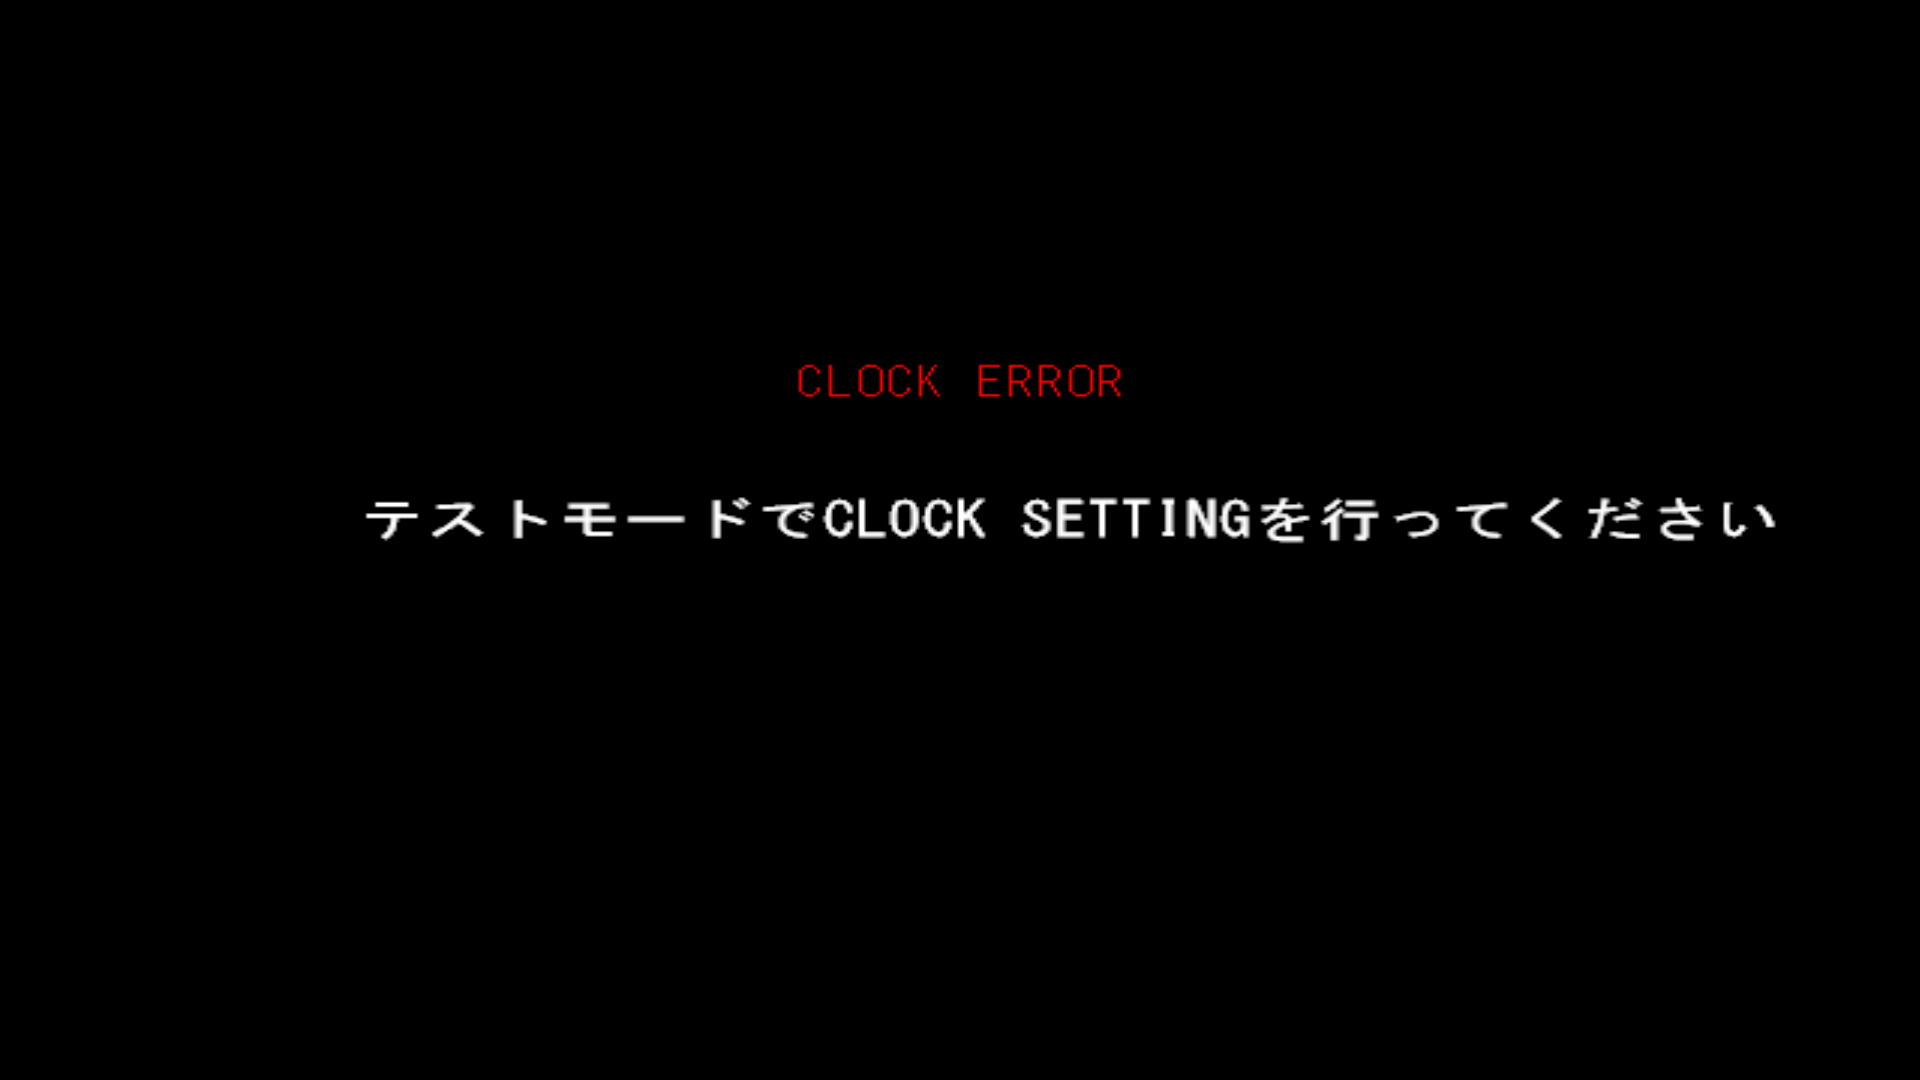
The game will automatically bring you into it's service menu.
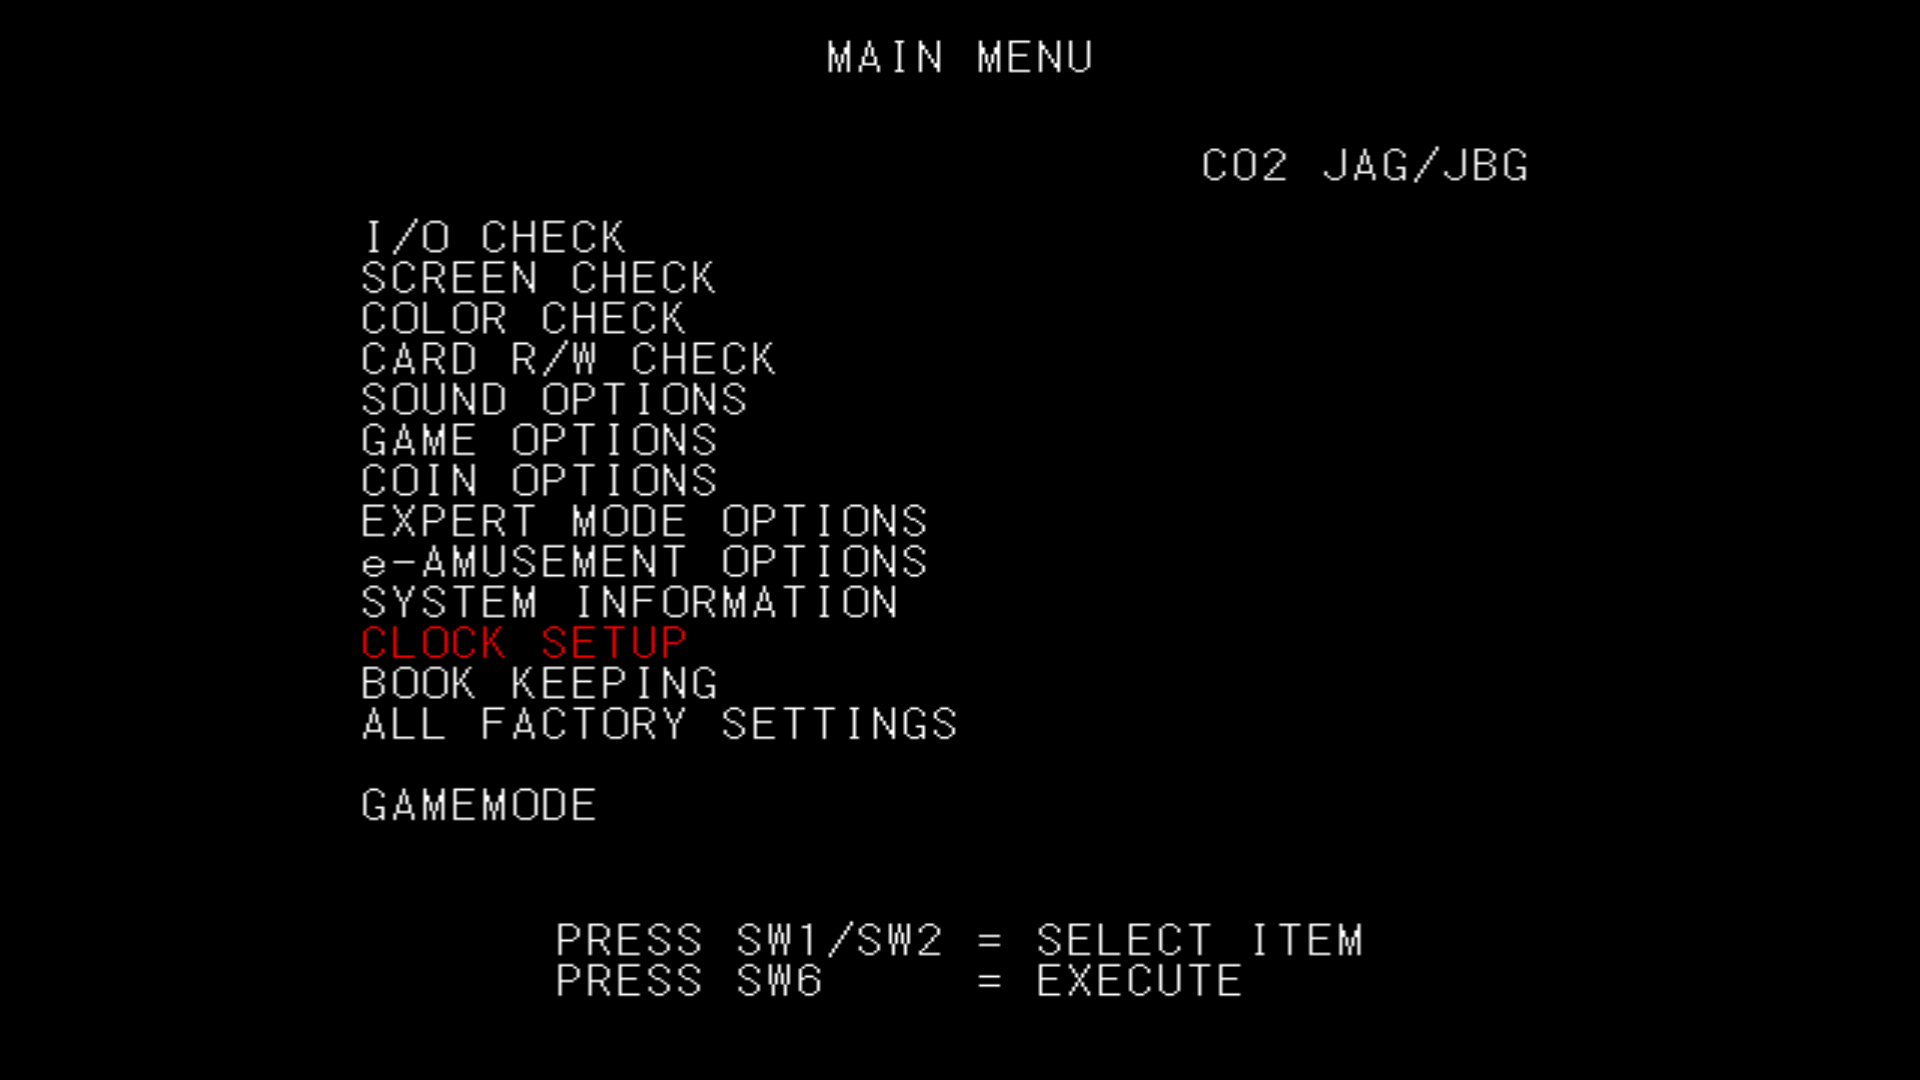
Instructions on how to navigate the menu are shown at the bottom of the screen.
- Press
1and2to go up and down. - Press
6to select/execute.
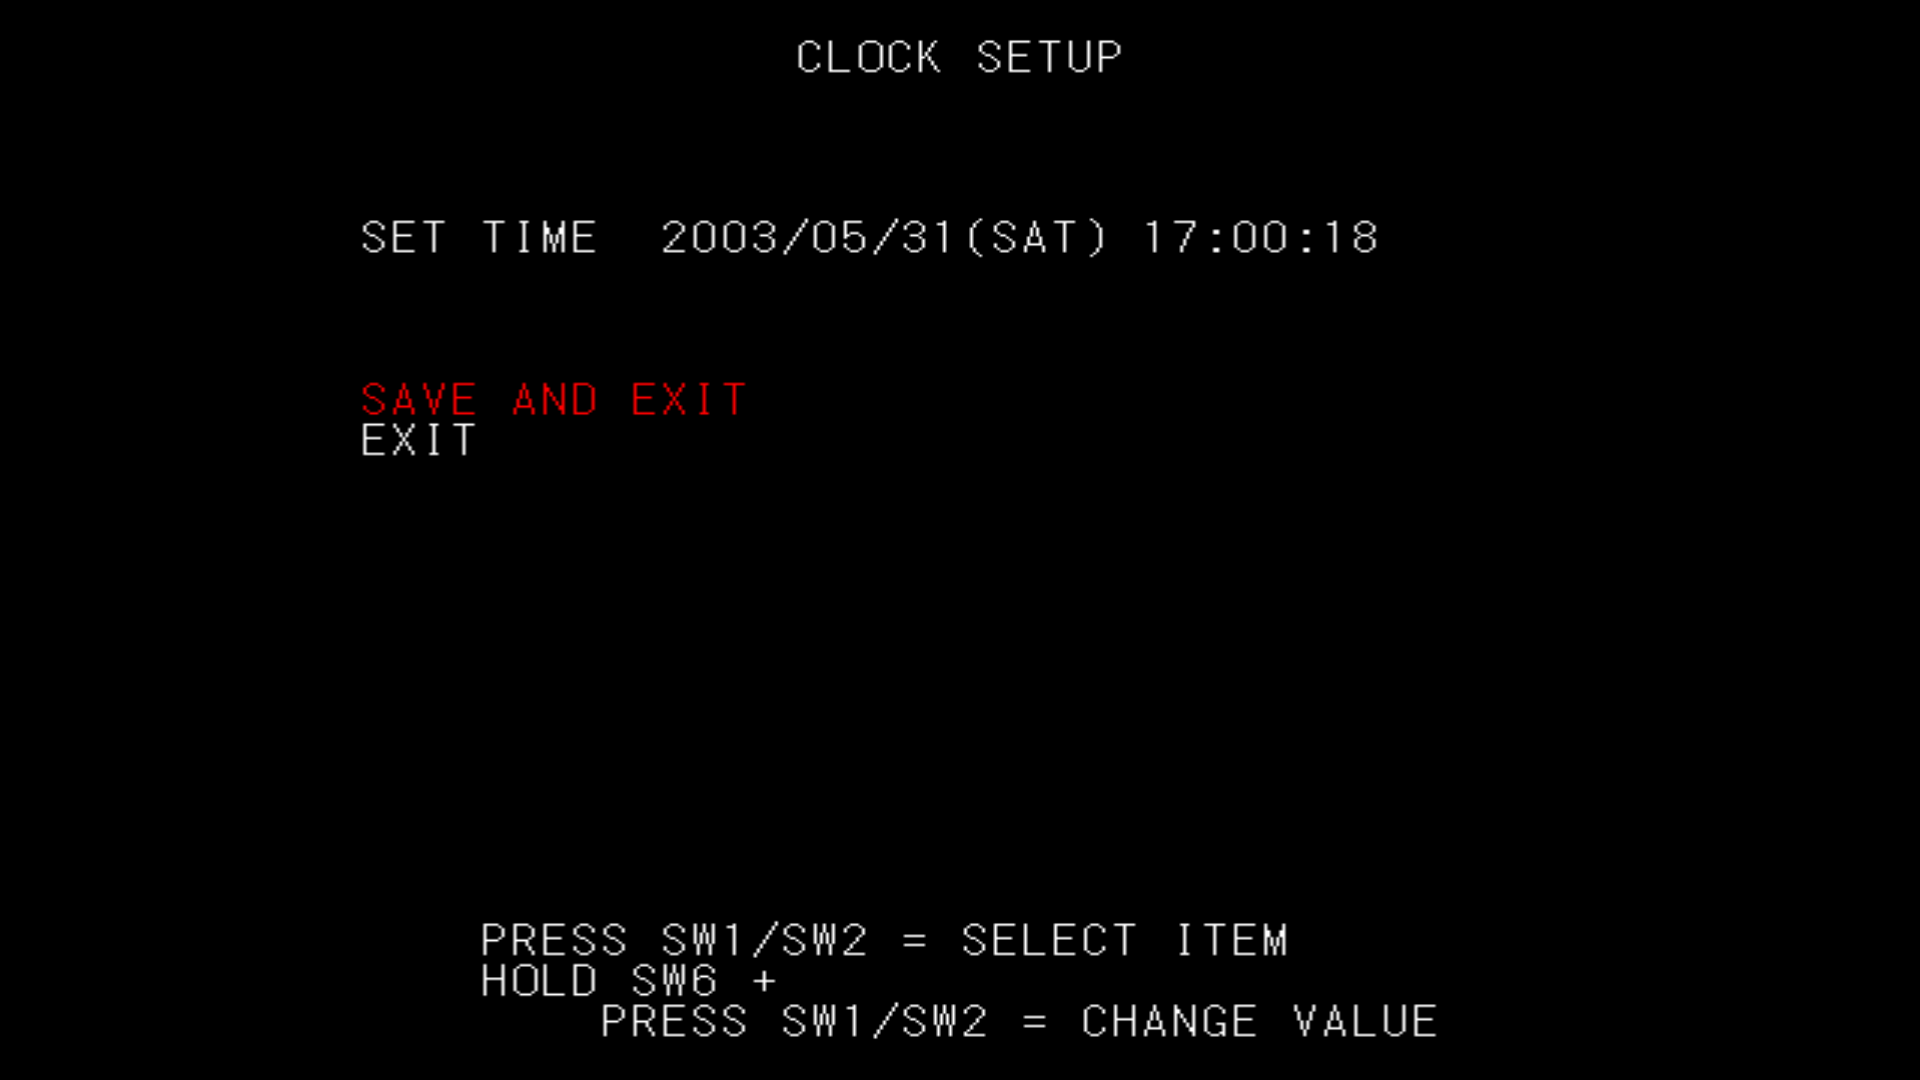
Navigate to CLOCK SETUP. You do not need to manually change it. Navigate to SAVE AND EXIT.
If you'd like to play offline, you can head straight to Final Notes
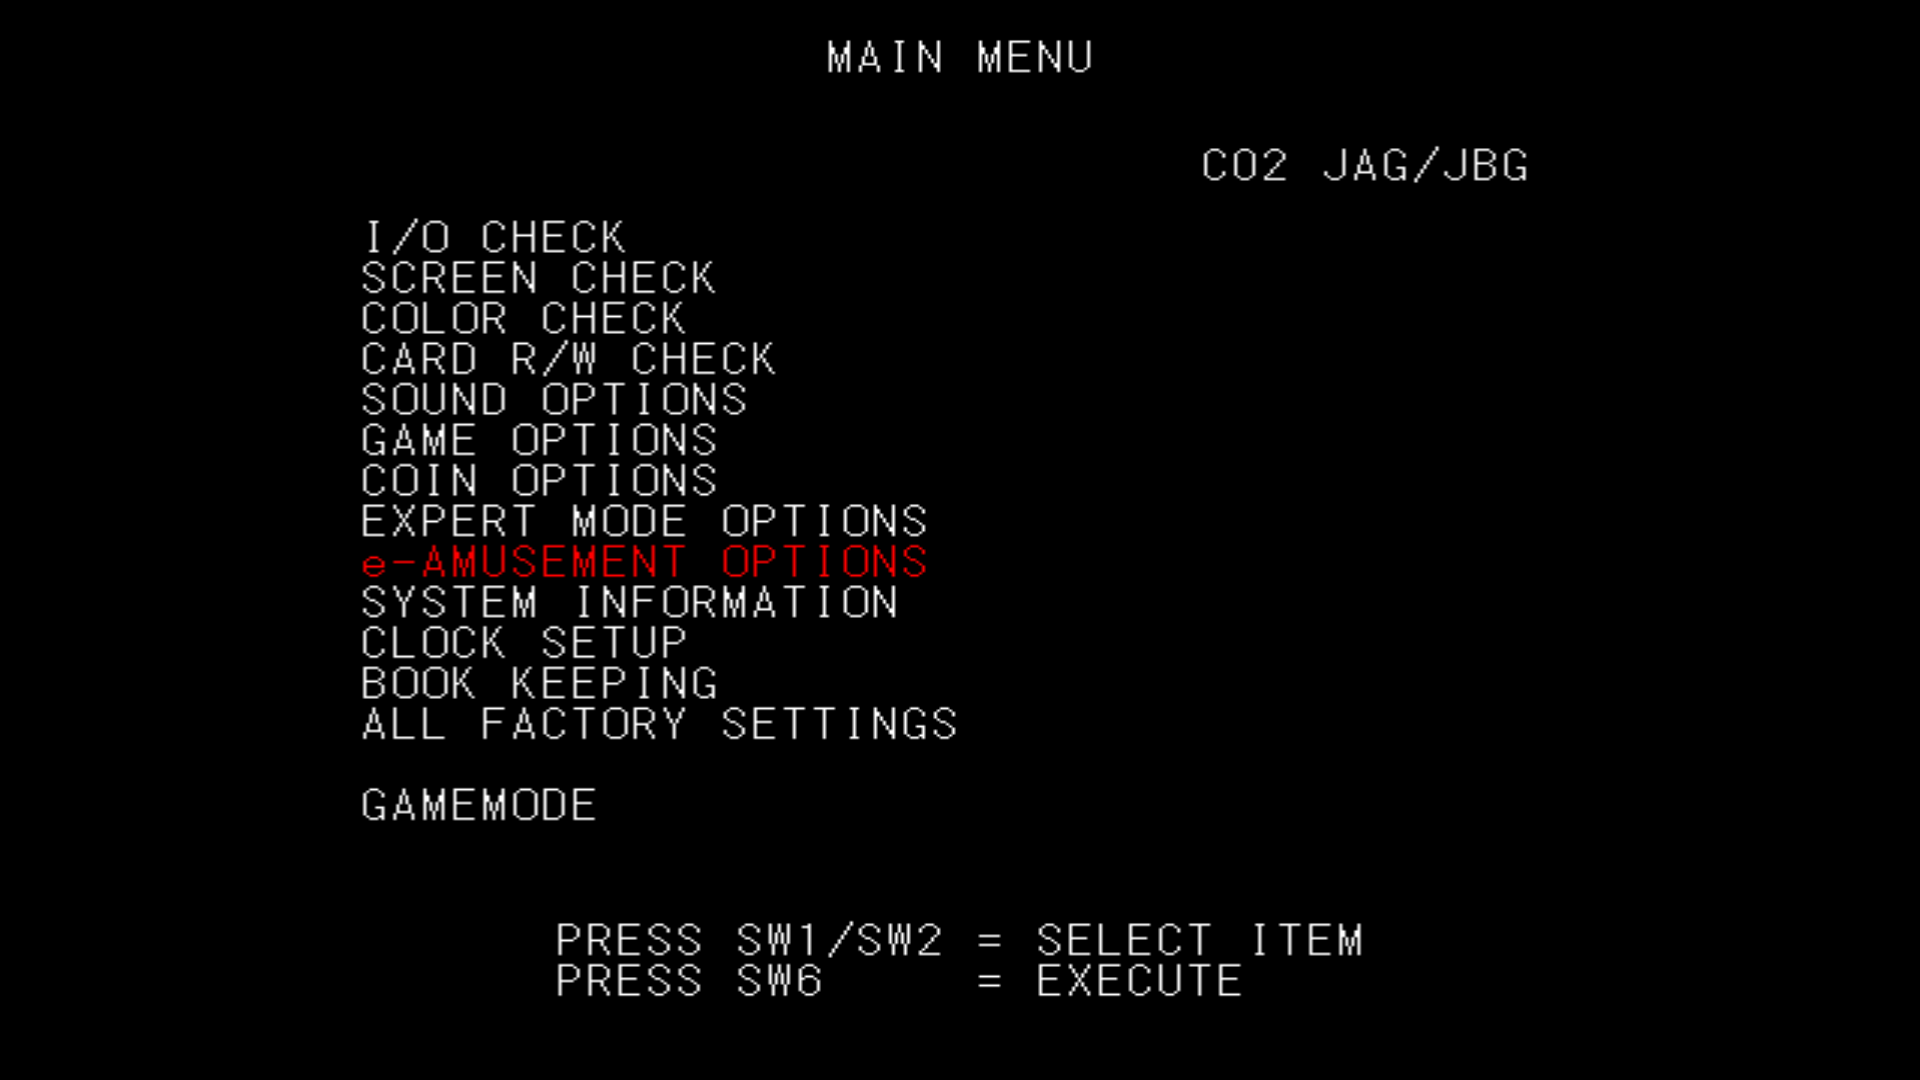
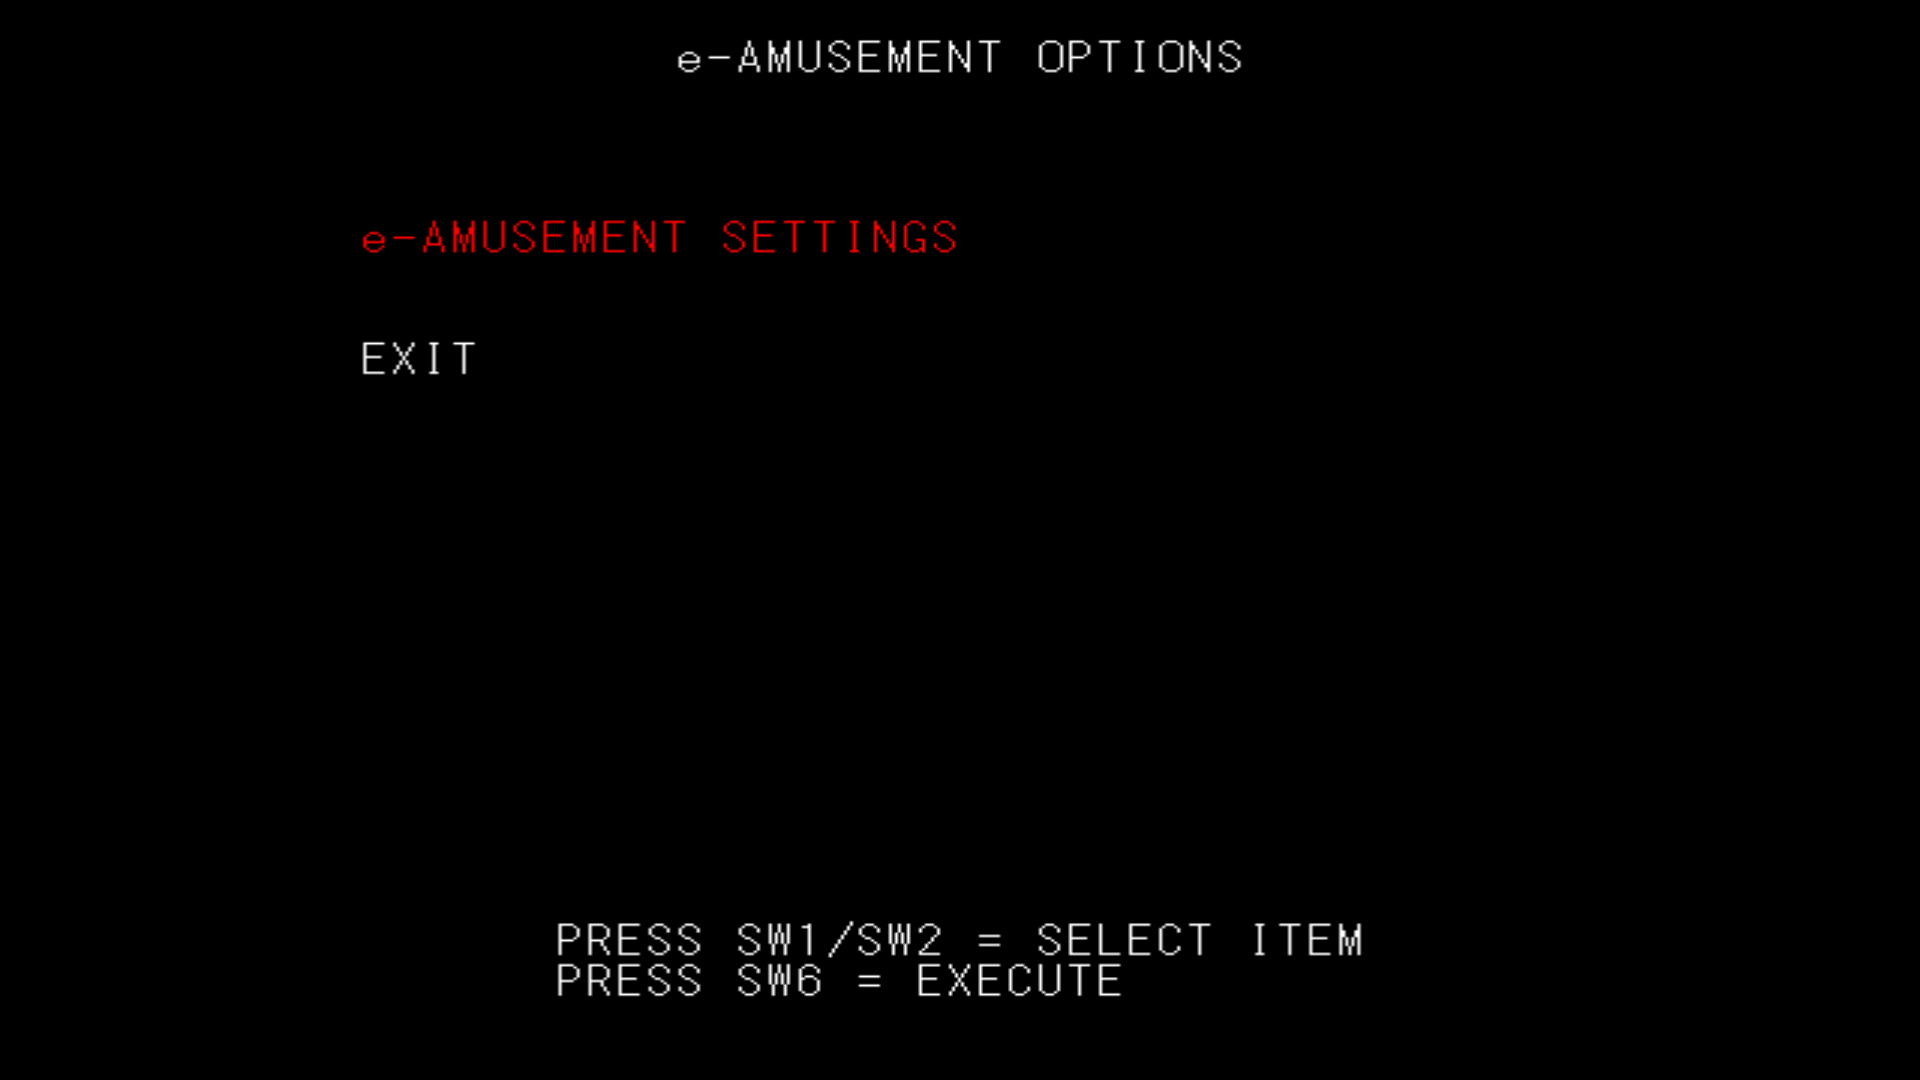
Enabling e-AMUSEMENT for Online Play
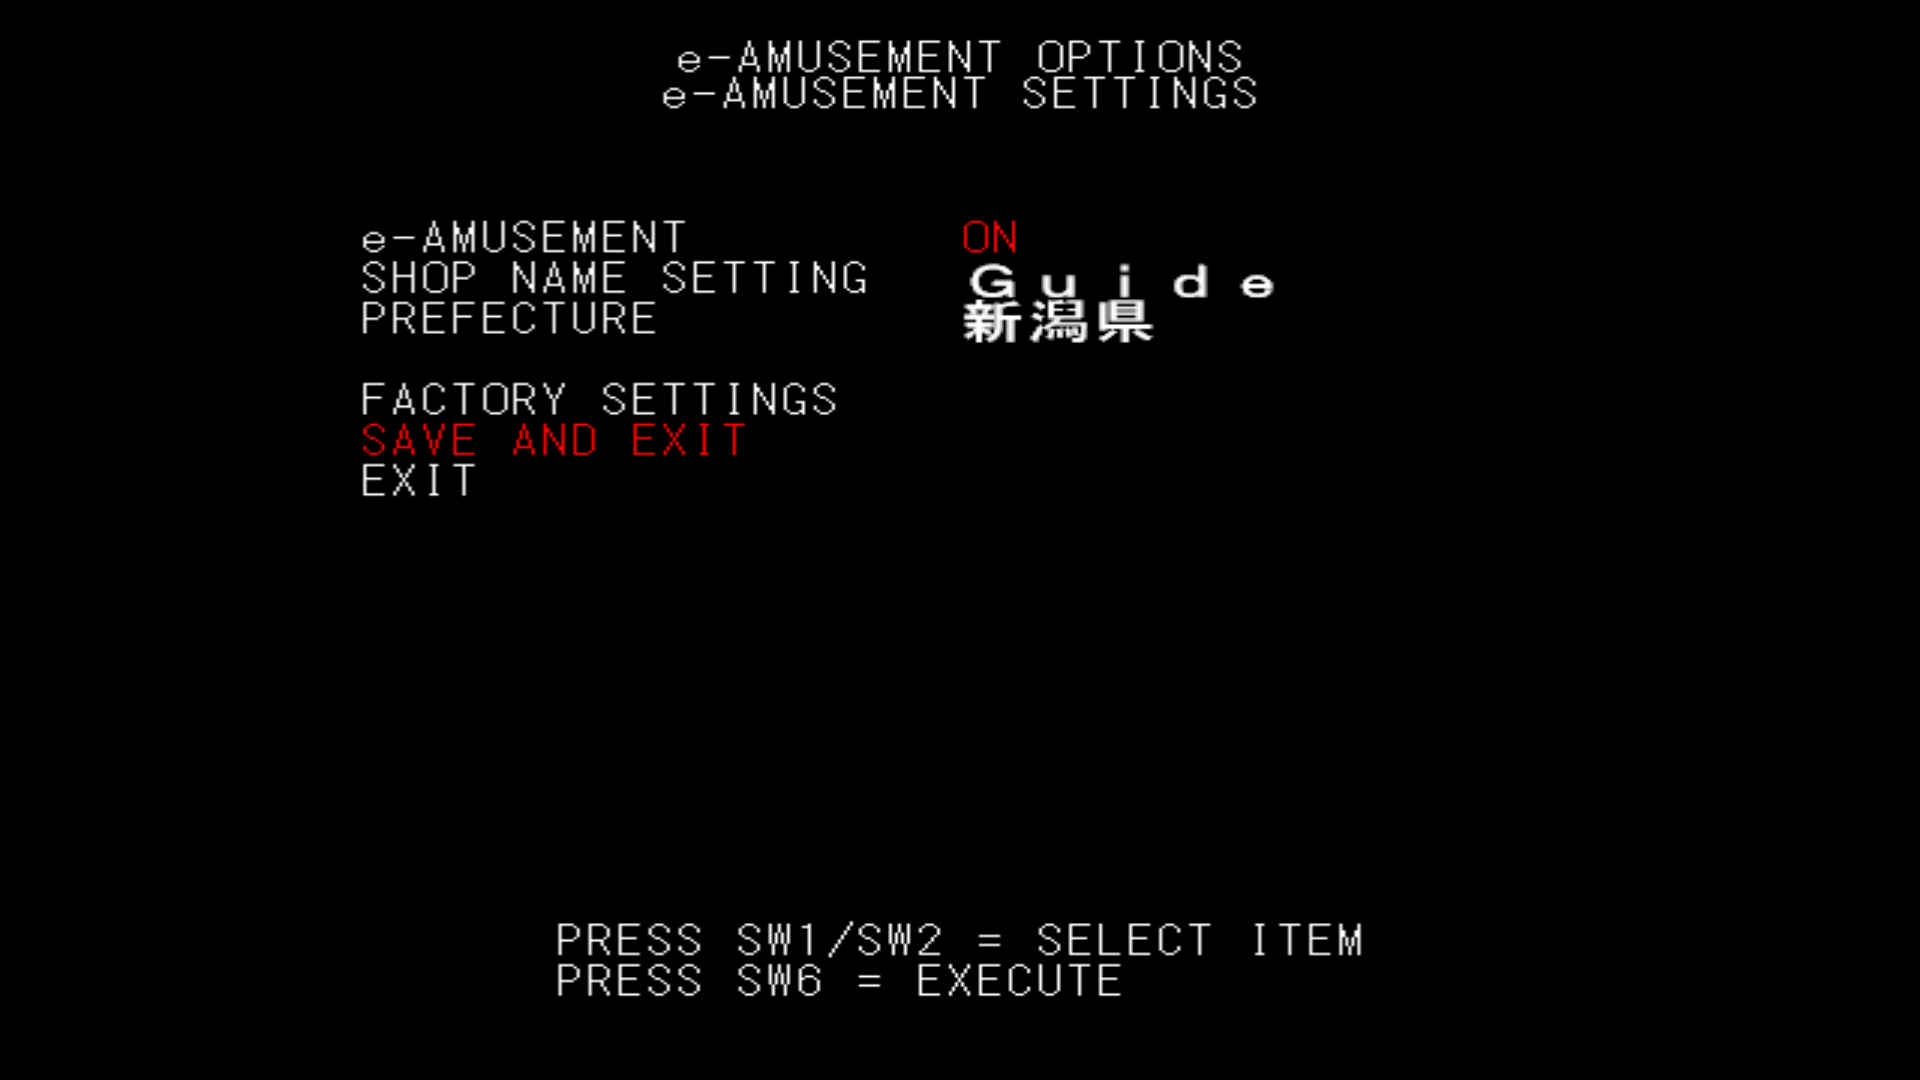
From the service menu, go to e-AMUSEMENT OPTIONS then e-AMUSEMENT SETTINGS.
It'll bring you to this screen, change it so that e-AMUSEMENT switches to ON and it will look like this:
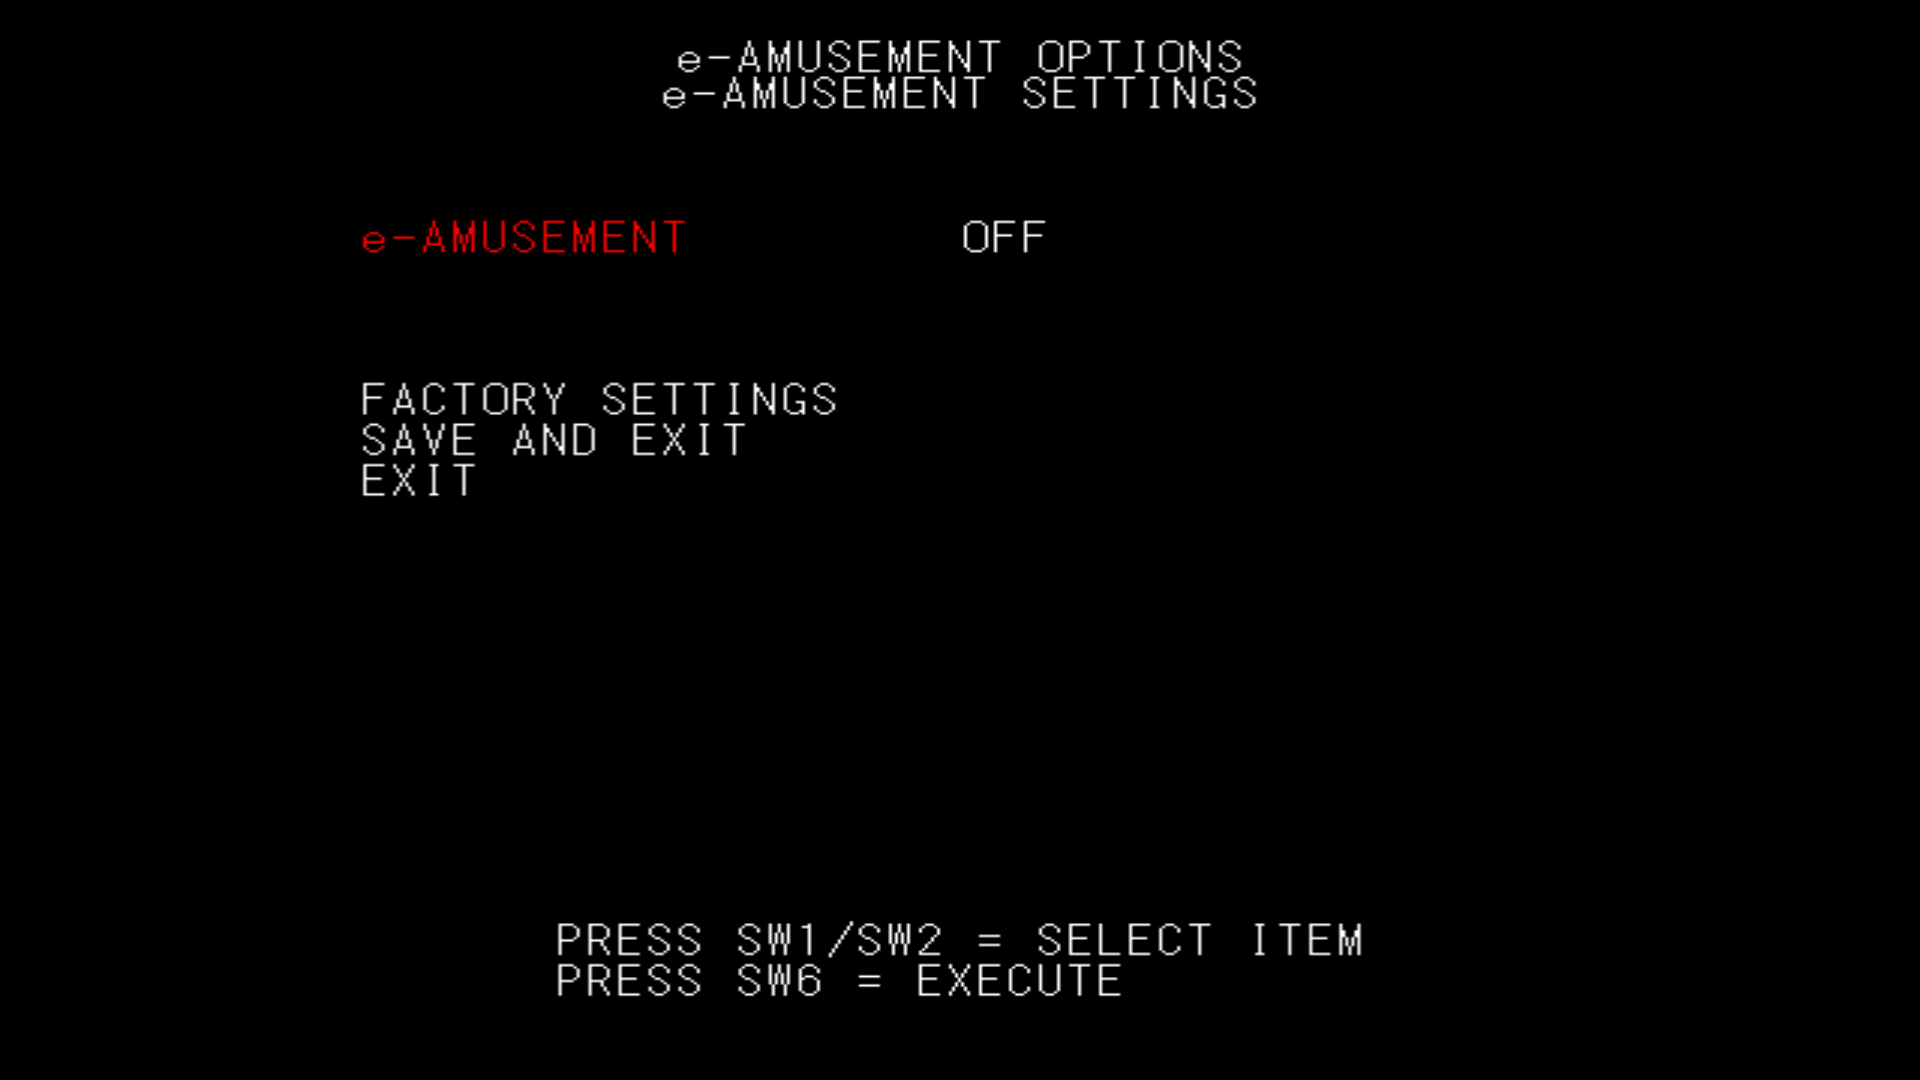
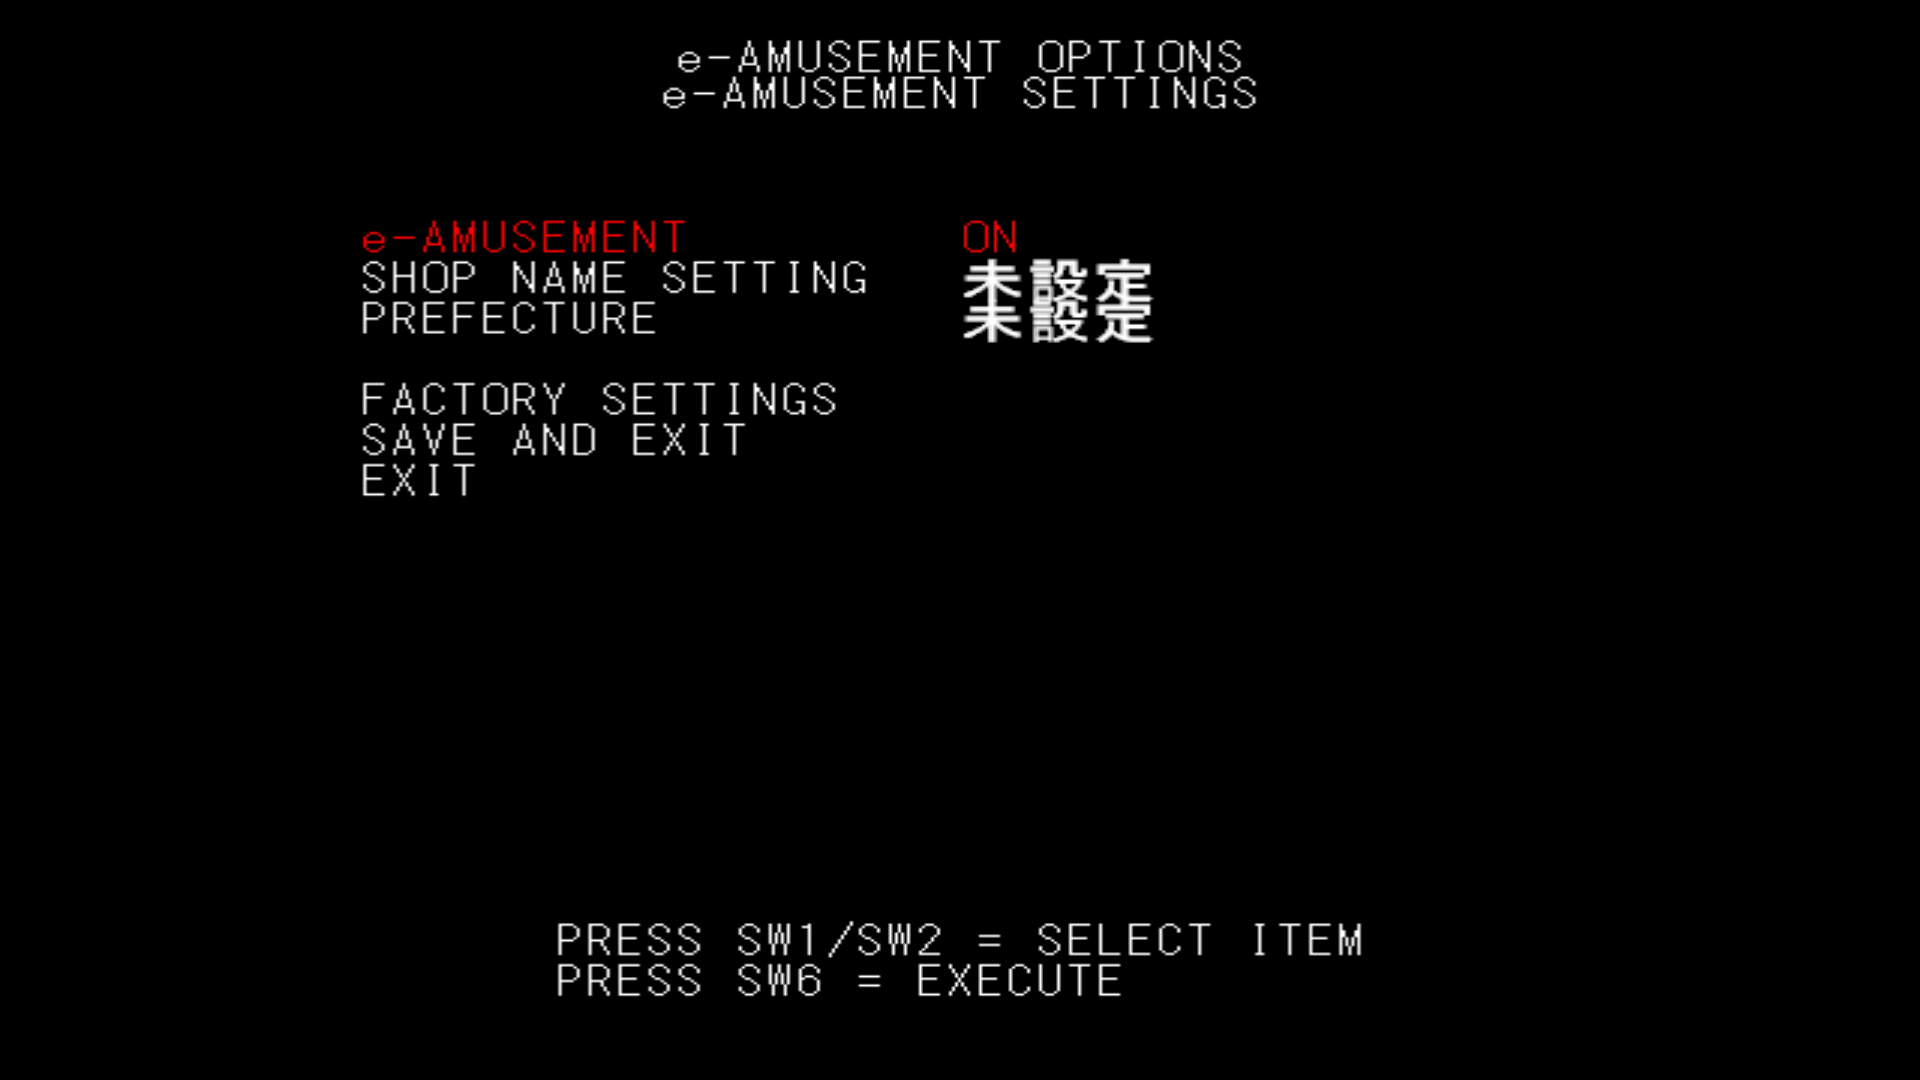
We will need to set a SHOP NAME SETTING and change our PREFECTURE otherwise the game will throw errors at us.
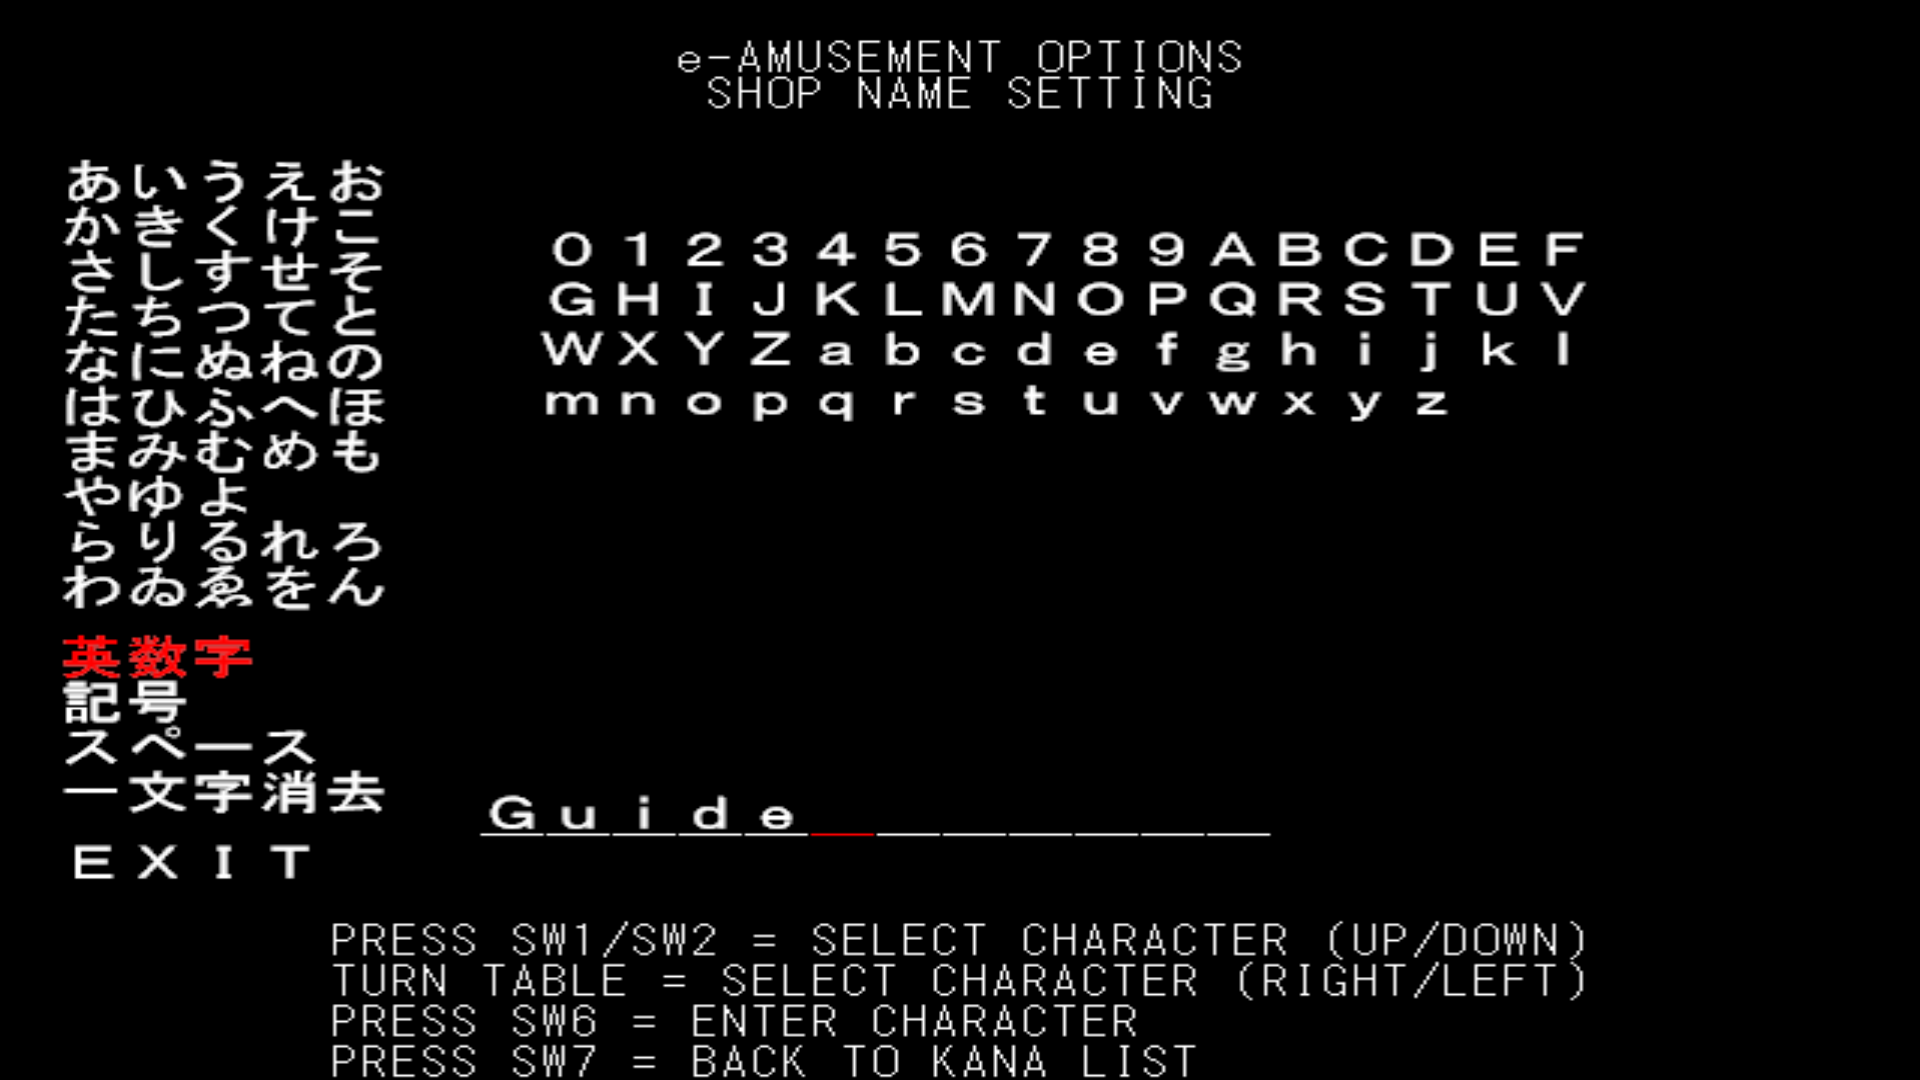
- Name your shop to whatever you'd like. Instructions on how to navigate are at the bottom of the screen.
- Navigate to
EXITand select it. - Change your prefecture once or how many times you'd like, it doesn't matter as long as it's not the default one.
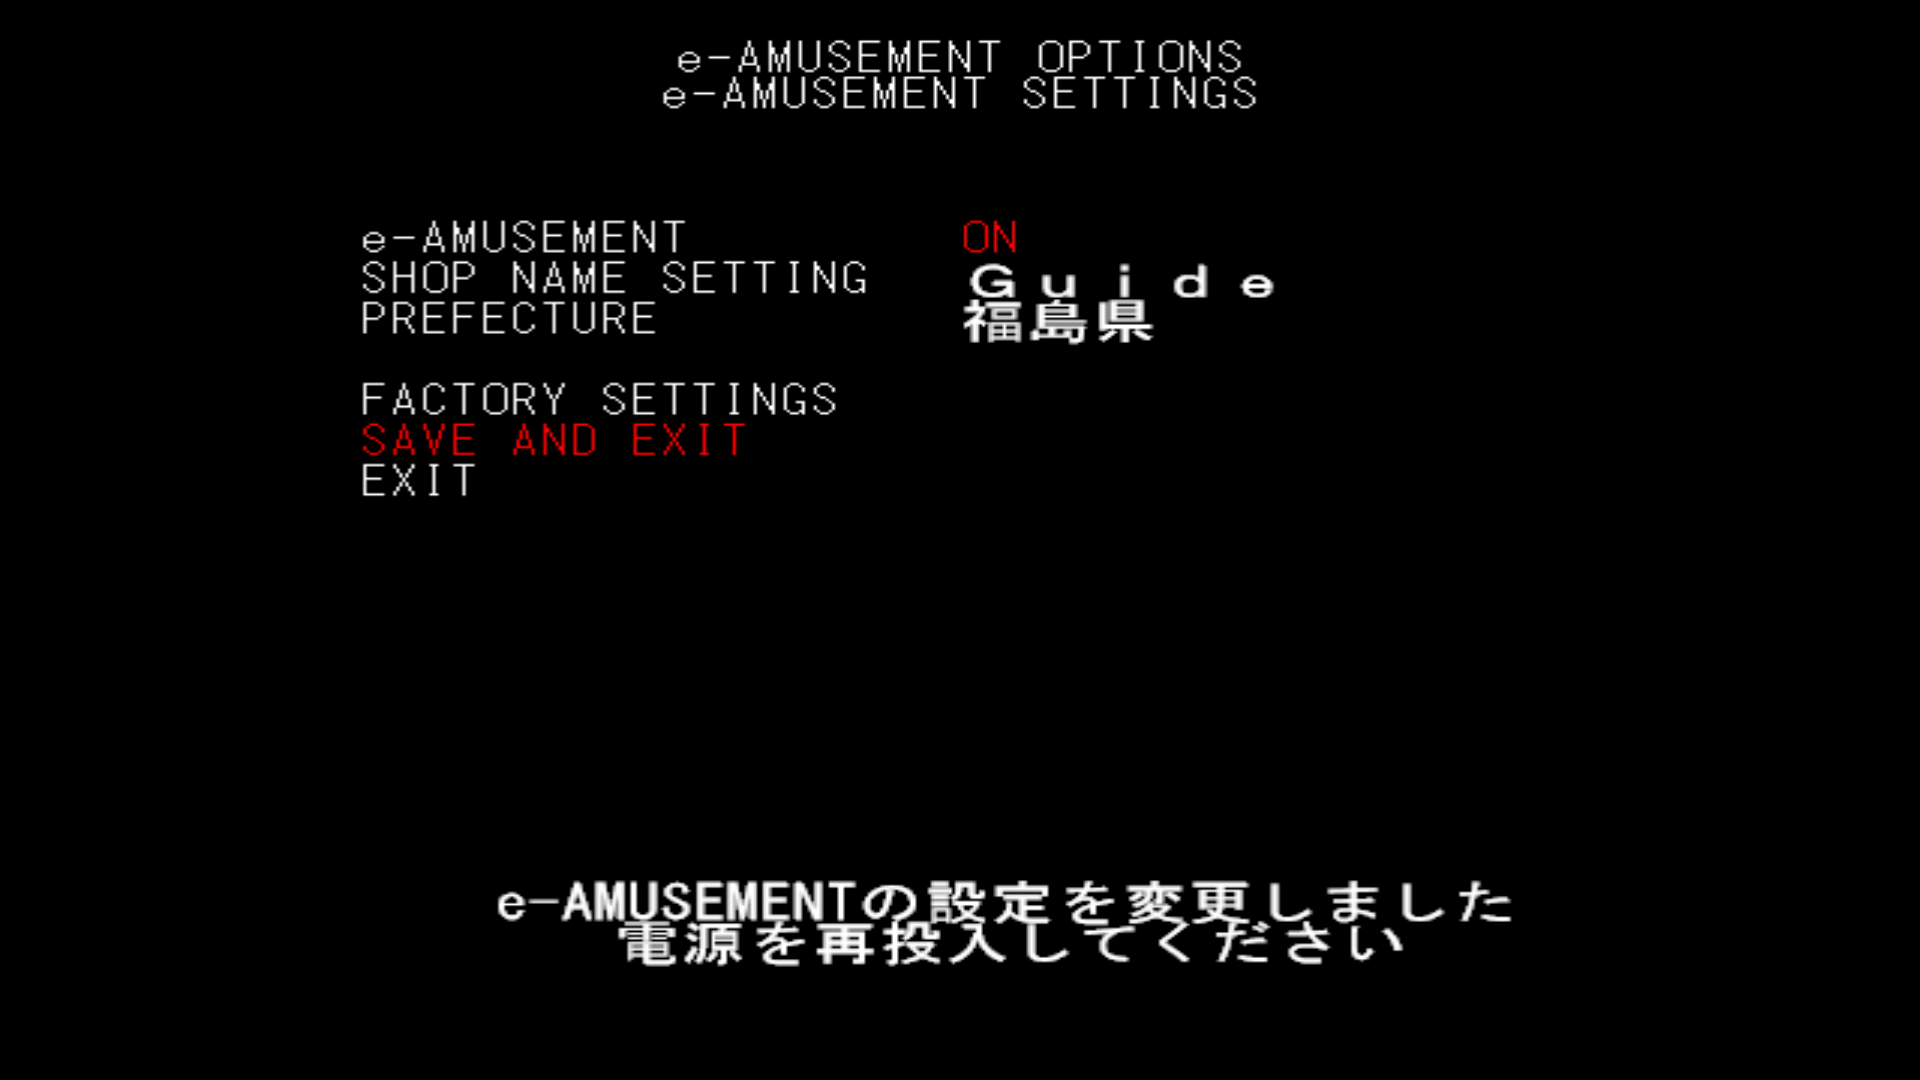
Select SAVE AND EXIT. The game will now give you a message, which translated means:
e-AMUSEMENT settings have been changed. Please turn the power off and on again.
So, close the game and open it again.
Final Notes
You're all done! Make sure to insert two credits by pressing your SERVICE key. Have fun!
Have any other errors?
Check out the Troubleshooting section.