![]()
Game Setup
You must obtain clean, unmodified and complete data to proceed with our guides
Corrupted or incomplete files will cause unpredictable issues we can't cover.
TWO-TORIAL does not provide or distribute game data. Do not ask.
Preparing data
Ensure your game files are not marked as read-only:
- Right click the directory containing your files
- Click on
Properties - Under the
Generaltab, findAttributesand uncheckRead-only - Click
Apply - When prompted, select
Apply changes to this folder, subfolders and files - Click
OKto confirm, thenOKagain to close Properties
The complete game data should be approximately 20 GB or larger.
If your data is significantly smaller, you likely have an update archive instead of the full game data.
Here's what the expected data structure should look like:
If your data does not look like this
If you have .dll files next to your data, prop, etc., folders:
- Create a
modulesfolder if it does not exist already - Move all
.dllfiles into it
If extra directories or files are still present (executables, scripts, etc.), remove them.
This also indicates tampered data, we strongly recommend obtaining clean data from elsewhere.
If your data is already up-to-date, you can skip ahead to the Installing spice2x section
Updating data
For a comprehensive list of all game updates in chronological order, visit BemaniWiki
Make sure you're using the right update for your current game version
SDVX updates have KFC and one or two datecodes in their archive names.
Single datecode: Contains one update (e.g., KFC_NewDateCode.7z)
Two datecodes: Updates from the older to newer version (e.g., KFC-OldDateCode-NewDateCode.rar)
In the two-datecode example:
OldDateCodeis the older date, the game version required to apply this updateNewDateCodeis the newer date, and is the version you'll arrive at after applying the update
- Extract the update to your game directory, ensure directories align and overwrite files when prompted
- Open
prop\ea3-config.xmland find the<ext>line: - Update the datecode to match your new game version and save
- If
prop\bootstrap.xmlexists, also update its<release_code>line:
Installing spice2x
If you already have spice2x installed, ensure you're using the latest version
- Visit spice2x.github.io to download the latest release
- Extract both
spice64.exeandspicecfg.exefrom the archive into your game's directory
Additional steps for AMD and Intel graphics cards
Since KONAMI games are designed for NVIDIA GPU's, AMD and Intel users need additional files:
- Locate the
spice2x\stubs\64\folder in the spice2x archive - Extract all
.dllfiles from there into your game'smodulesfolder
Configuring spice2x
Following tabs correspond to the ones found in spicecfg
Additional information is available at spice2x's wiki.
Avoid changing or patching anything you don't need or understand unless explicitly told to
This tab is used to bind your keyboard and controller buttons
Bind vs Naive
Bind - Use for controllers and hardware devices. More responsive and detects any HID device.
Naive - Use for device agnostic keyboard binds. Less responsive but works with simulated keystrokes.
Binding your buttons
Click on Bind or Naive then press the key you want associated with the action.
With your controller and/or keyboard plugged in, configure your keys for:
- Maintenance:
Service, Test - Game buttons:
BT-A, BT-B, BT-C, BT-D, FX-L, FX-R, Start - P1 Keypad:
Keypad 0 to 9, Keypad Insert Card
Only if you play with a keyboard:
- Knobs:
VOL-L Left, VOL-L Right, VOL-R Left, Vol-R Right
Additional info
- Use page navigation at the bottom to bind multiple buttons to the same input
- Check Bind Many to bind multiple controls in sequence
- Click Edit after binding for advanced options (invert, MIDI sensitivity, etc.)
This tab is used to bind analog controls like knobs
Ignore this tab if you play with a keyboard
Bind your controller's knobs
With a controller, instead of binding to VOL-L and VOL-R in the Buttons tab, you need to:
- Click
Bind - In
Device, pick your controller - In
Control, pick the control that updates the preview when turning the corresponding knob - Click
Close, leaving the rest of the settings alone - Repeat for your other knob
This tab is used to bind keys to toggle spice2x and game-related overlays
Binding extra buttons here is optional, defaults are fine
Click on Bind or Naive then press the key you want associated with the action.
This tab allows you to configure controller lights to sync with the game
Not all controllers support this, but it does not affect gameplay and is completely optional.
- Click
Bind - In
Device, pick your controller - In
Light Control, select the corresponding light - Click
Close - Repeat for your other lights
This tab lets you configure which cards are used to save your game profile to
If you own a physical e-amuse/FeliCa card and a compatible NFC card reader
Setup instructions vary depending on your specific reader model.
Navigate to the Advanced tab and scroll down to the NFC Card Readers section.
Browse the available options and hover over each one to view descriptions and configuration guidance.
There is no need for you to specify cards for either player in this tab when using a card reader.
If you don't, you can use a virtual card number instead
If you already have generated a card number before, you may use this one.
To generate a new card number for Player 1 or 2:
- Click on
Open... - Choose where to save your card number
- Give it a file name (e.g.
card0.txt) - Click save
- Finally, click on
Generate
This will automatically generate a valid card number for you and keep it in the file you specified.
Go through the spice2x Patching to import and pick patches
No need to change anything here
NVIDIA GPU users ONLY
Enable NVIDIA profile optimization (-nvprofile) to let spice2x create an optimized profile for your game.
No need to change anything here
No need to change anything here
Configuring audio
Check out our general Audio guide to understand audio modes better, at least the TL;DR
- Open
spicecfg.exe - At the very top, click on
ShortcutsthenAudio Playback Devices - In the popup window, right click on your default audio device, and click on
Properties - Go to the
Advancedtab
Then, depending follow instructions for your desired audio mode:
Setup for WASAPI Exclusive (default)
- Check both boxes under
Exclusive Mode - Open the
Default Formatdropdown - Pick the
16 bit, 44100 Hz (CD Quality)option, clickApplythenOK
Setup for WASAPI Shared
- Open the
Default Formatdropdown - Pick the
16 bit, 48000 Hz (DVD Quality)option, clickApplythenOK - Return to
spicecfg, go to thePatchestab - Following the patching guide and patch
Shared Mode WASAPI
Optionally: go to the Options tab, and at the very bottom enable Low Latency Shared Audio to help mitigate the latency penalty from using Shared audio.
Setup for ASIO (requires specialized hardware)
- Check both boxes under
Exclusive Mode - Open the
Default Formatdropdown - Pick the
16 bit, 44100 Hz (CD Quality)option, clickApplythenOK
Connecting to a network
Pick one or the other, not both!
Option 1: Remote (Online Network)
Remote networks typically require an invitation to join.
You'll need to connect with members of the community who can provide you with an invite.
Your network should provide you with the necessary information to proceed:
- Open
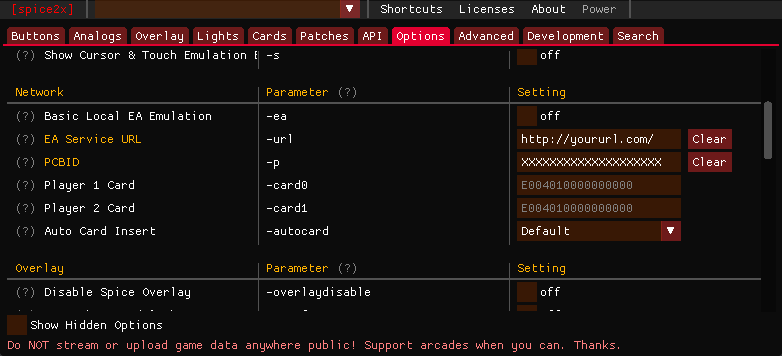
spicecfg.exeand head to theOptionstab
Under the Network category, set the following settings provided by your network:
EA Service URL (-url)PCBID (-p)
Option 2: Local e-amuse Emulator (Asphyxia)
For instructions on setting up Asphyxia, please refer to our Asphyxia setup guide.
After Asphyxia is setup with the proper plugin for your game:
- Open
spicecfg.exeand head to theOptionstab - Under the
Networkcategory, set yourEA Service URL (-url)to point to your asphyxia server, typicallylocalhost:8083
Configuring your game
Read through the Extra Information page
Monitor Orientation
This game requires your main monitor to be set to Portait or Portait (flipped) mode
You will play in Portait mode (Recommended)
- Right click on your Desktop
- Select
Display settings - Look for
Display orientationand set it toPortraitorPortrait (flipped) - Rotate your monitor 90°
You cannot play in Portait mode
In this case, your only option is to:
- Open
spicecfg, go to theOptionstab - Set the game to
Windowed Mode (-w) - Set your desired
Window Resolution (-windowsize)for the game
Installing VCRedist & DirectX
Download and install:
Before playing
A few things to remember before each play session
- Close of any applications running in the background which could affect performance
- Double-check your monitor is oriented properly for this game
- Double-check your sample rate is correct for this game
- Connect your controller
First launch
If you've followed all instructions correctly, you're finally ready to launch the game!
Run spice64.exe, press Yes when it asks for elevated privileges.
The game will go through a series of checks, let it run, if you've done everything properly they'll pass.
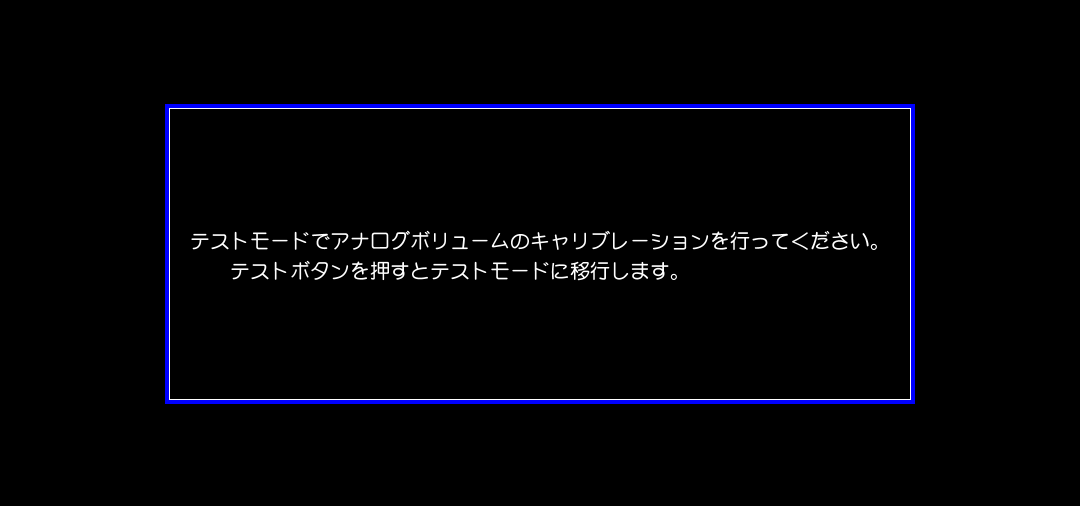
If you're seeing this screen, it means you need to calibrate your knobs.
Press your Test key to go to the service menu.
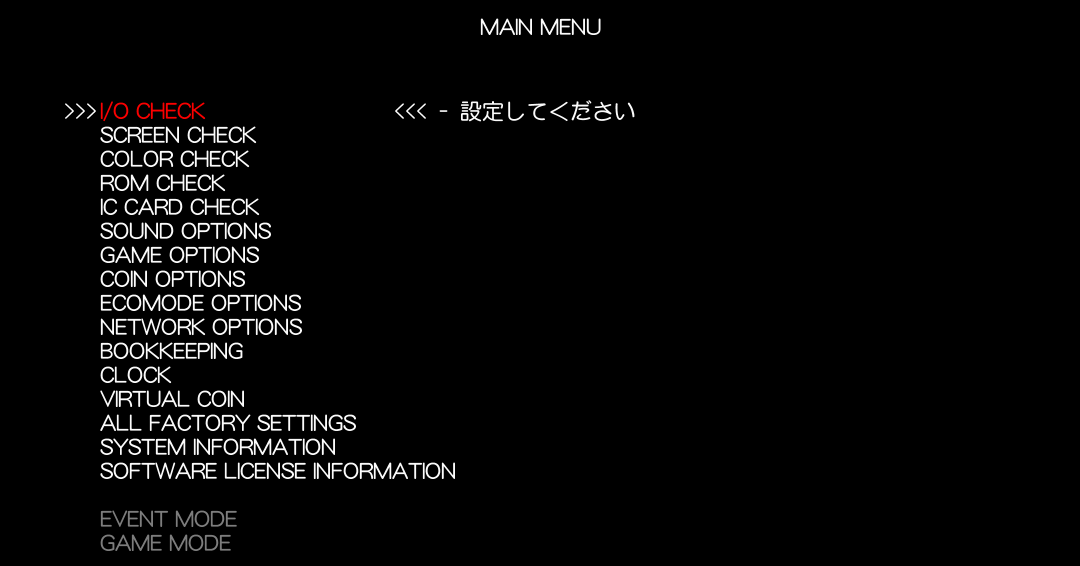
Instructions on how to navigate the menu are shown at the bottom of the screen:
- Press
BT-Ato go up - Press
BT-Bto go down - Press
Startto select
Select I/O CHECK and press Start.
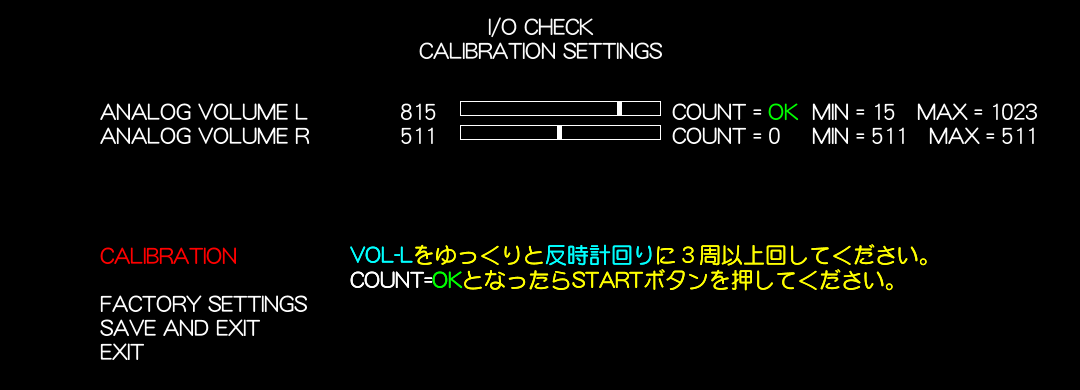
Select CALIBRATION SETTINGS and press Start.

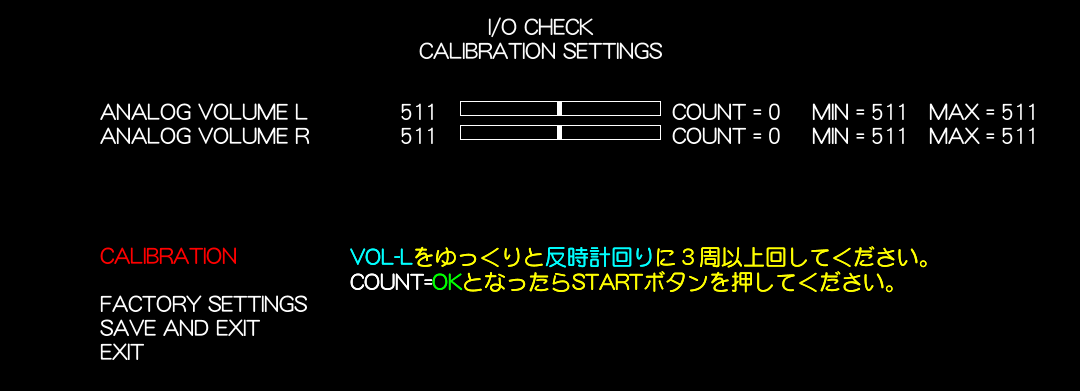
Select CALIBRATION and press Start.
First, your left knob (VOL-L for keyboard players)
- Slowly turn your LEFT knob counterclockwise (
VOL-L Left) until the line saysCOUNT = OKthen pressStart. - Slowly turn your LEFT knob clockwise (
VOL-L Right) until the line saysCOUNT = OKthen pressStart.
Now same thing but for the right knob (VOL-R for keyboard players)
- Slowly turn your RIGHT knob counterclockwise (
VOL-R Left) until the line saysCOUNT = OKthen pressStart. - Slowly turn your RIGHT knob clockwise (
VOL-R Right) until the line saysCOUNT = OKthen pressStart.
Select SAVE AND EXIT and press Start.
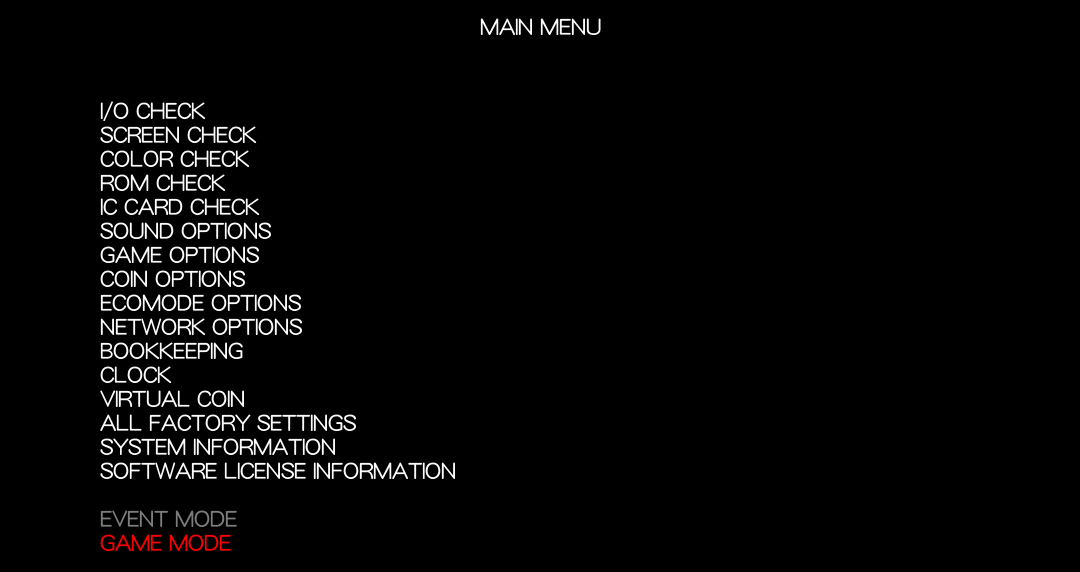
Select GAME MODE and press Start.
You're all done! The game should load up properly now
Help
Something's wrong?
Make sure you've followed all steps correctly and also read other relevant guides.
Still stuck? You can join our Discord community server for support!
Click on the Discord logo at the bottom right of the page.