![]()
Game Setup
You must obtain clean, unmodified and complete data to proceed with our guides
Corrupted or incomplete files will cause unpredictable issues we can't cover.
TWO-TORIAL does not provide or distribute game data. Do not ask.
Preparing data
Ensure your game files are not marked as read-only:
- Right click the directory containing your files
- Click on
Properties - Under the
Generaltab, findAttributesand uncheckRead-only - Click
Apply - When prompted, select
Apply changes to this folder, subfolders and files - Click
OKto confirm, thenOKagain to close Properties
The complete game data should be approximately 26 GB or larger.
If your data is significantly smaller, you likely have an update archive instead of the full game data.
Here's what the expected data structure should look like:
Installing Bemanitools
-
Download the latest Bemanitools release here
-
Inside
bemanitools-x.xx.ziplocateiidx-14-to-17.zip -
Extract all files from
iidx-14-to-17.zipto your revision directory (yyyymmddrr)
You may delete the gamestart-[14,15,17].bat and iidxhook-[14,15,17].conf files as you only need the ones for 16 (Empress)
-
Download the latest Bemanitools supplements release here
-
Inside
bemanitools-supplement-vx.x.ziplocatemisc.zip -
Inside
misc\d3d8to9\, extractd3d8.dllto your revision directory
This lets you configure graphics options inside iidxhook-xx.conf (xx being your game version number)
For background movies to work, you need to install and register a codec.
This also applies for IIDX 12 to 18, if you'd done it before you shouldn't need to again and may skip this step.
-
Inside
bemanitools-supplement-vx.x.ziplocate and openiidx.zip -
Inside
iidx\misc\, extractCLVSD.axto any directory where the file can stay long term
As an example we will be using your Documents folder, but it really could be anywhere you prefer. -
Open a command prompt as administrator, and run
regsvr32 "CHOSEN_PATH\CLVSD.ax"
For the Documents folder, the command would beregsvr32 "C:\Users\YOUR_USERNAME\Documents\CLVSD.ax"
You should get confirmation that the file has been registered successfully.
If an error occurs, you most likely didn't start your command prompt as administrator, or the location to CLVSD.ax was incorrect.
In the end, here's what the expected data structure should look like:
Configuring Bemanitools
Open the config.bat file. The following tabs correspond to the ones in the configuration window.
This tab is used to bind your keyboard and controller buttons
Double click on the right on a button that you wish to bind, then press the key you want associated with the action.
With your controller and/or keyboard plugged in, configure your keys for:
- Maintenance:
Service, Test - P1 Game buttons:
1 to 7, Start, EFFECT, VEFX - P1 Keypad:
Keypad Insert Card
Only if you're playing using a keyboard:
- Turntable:
TT+, TT-and optionallyTT+/-which alternates betweenTT+andTT-on each press.
Additional info
- Use page navigation at the bottom to bind multiple buttons to the same input
- Check Bind Many to bind multiple controls in sequence
- Click Edit after binding for advanced options (invert, MIDI sensitivity, etc.)
This tab allows you to configure controller lights to sync with the game
Not all controllers support this, but it does not affect gameplay and is completely optional.
- In
Device, pick your controller - In
Game Light, select the corresponding button that will be used for that light - Repeat for your other lights
This tab is used to bind analog controls like the turntable
Ignore this tab if you play with a keyboard
Bind your controller's turntable
With a controller rather than binding buttons to TT+ and TT-, you need to:
- Head to the
Analogstab at the top - In
Device, pick your controller - In
Control, pick whichever one corresponds to the turntable - Turn your turntable ensuring that the preview turns along with it
- Click
OK, leaving the rest of the settings alone
This tab lets you configure which cards are used to save your game profile to
If you haven't generated a card number before, you can grab one from here
Now we will set up our PIN pad and card.
- Click on
Keyboard devicefor whichever player's card reader you want to use - You may or may not have more than one option. To figure out which one is your actual keyboard, select a device inside that list and press a button on the numpad
- Once you have found your correct device, the
Keypad statuswill change (the number and location of the number does not matter, it only matters that it changed) - Create a
.txtfile in a location that is easily accessible, and name it however you like - Inside the file, paste in your card number. Example:
E0045812F8AFB2DE - Point to the file you created by clicking
Browse...and selecting it
If you don't have a numpad, tick Use top keyboard row for PIN pad input. This will also change the Card In button to Backspace
Connecting to a network
Pick one or the other, not both!
Option 1: Remote (Online Network)
Remote networks typically require an invitation to join.
You'll need to connect with members of the community who can provide you with an invite.
Your network should provide you with the necessary information to proceed:
-
Open
iidxhook-xx.conf(xx being your game version) with a text editor -
In the line
eamuse.server=localhost:80, replacelocalhost:80with your provided network url -
In the lines
eamuse.pcbid=XXXXXXXXXXXXXXXXXXXXandeamuse.eamid=XXXXXXXXXXXXXXXXXXXX, replace the part after=with your provided PCBID -
Example:
Option 2: Local e-amuse Emulator (Asphyxia)
For instructions on setting up Asphyxia, please refer to our Asphyxia setup guide.
After Asphyxia is setup with the proper plugin for your game:
-
Open
iidxhook-xx.conf(xx being your game version) with a text editor -
In the line
eamuse.server=localhost:80, replacelocalhost:80to point to your asphyxia server, typicallylocalhost:8083 -
Example:
Configuring graphics
-
Open your
iidxhook-xx.conf(xx being your game version) -
Locate and change the options we're interested in:
gfx.framed=false                    # Only matters if windowed. False for borderless, True for decorations (title bar, etc..)
gfx.frame_rate_limit=0.0            # Set this to 59.95
gfx.windowed=false                  # False for fullscreen, True for windowed
gfx.window_width=0                  # Set to your desired game width (recommended: monitor width)
gfx.window_height=0                 # Set to your desired game height (recommended: monitor height)
gfx.scale_back_buffer_width=0       # Set to your desired game width (recommended: monitor width)
gfx.scale_back_buffer_height=0      # Set to your desired game height (recommended: monitor height)
gfx.scale_back_buffer_filter=none   # Set to point or linear (pick one from examples below)
Here are visual examples of the two filter options:
point (sharp, pixel perfect)
linear (less sharp, not pixel perfect)
Before playing
A few things to remember before each play session
- Close of any applications running in the background which could affect performance
- Double-check your monitor is oriented properly for this game
- Double-check your sample rate is correct for this game
- Connect your controller
First launch
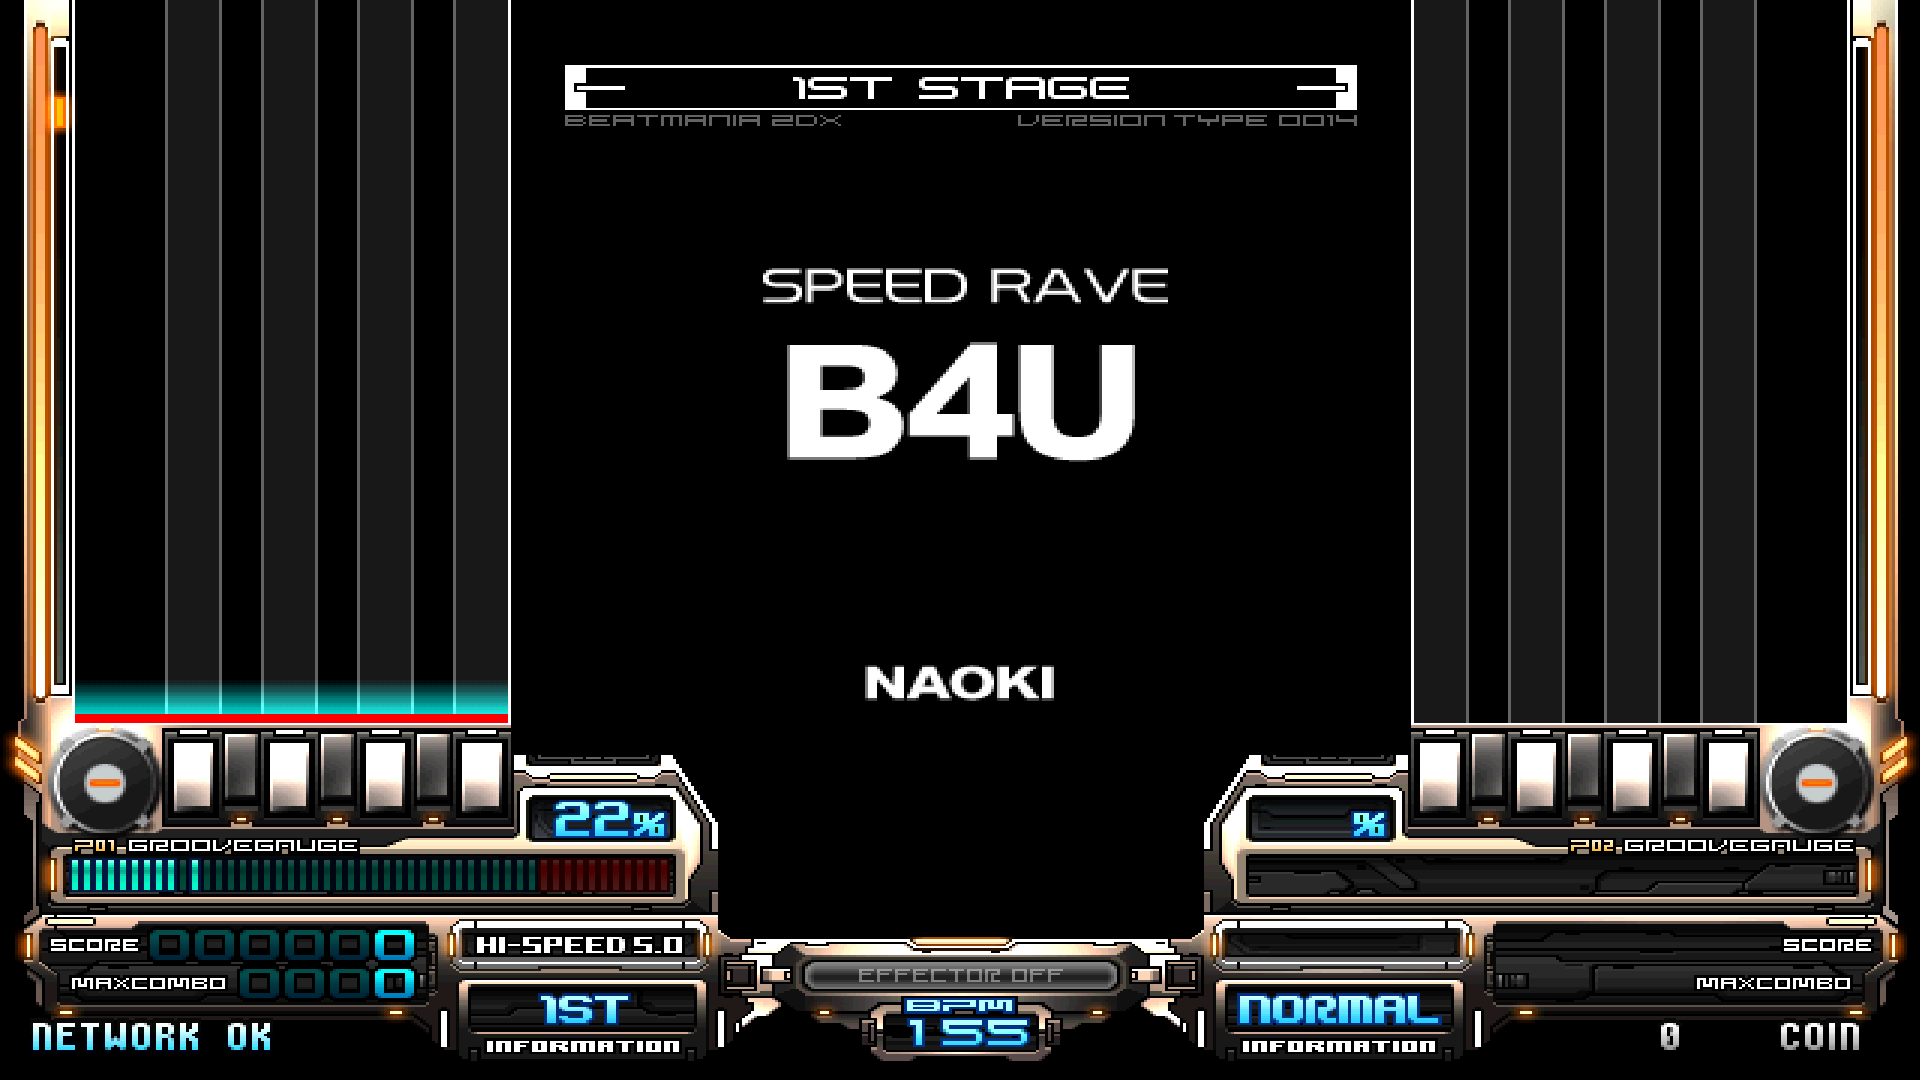
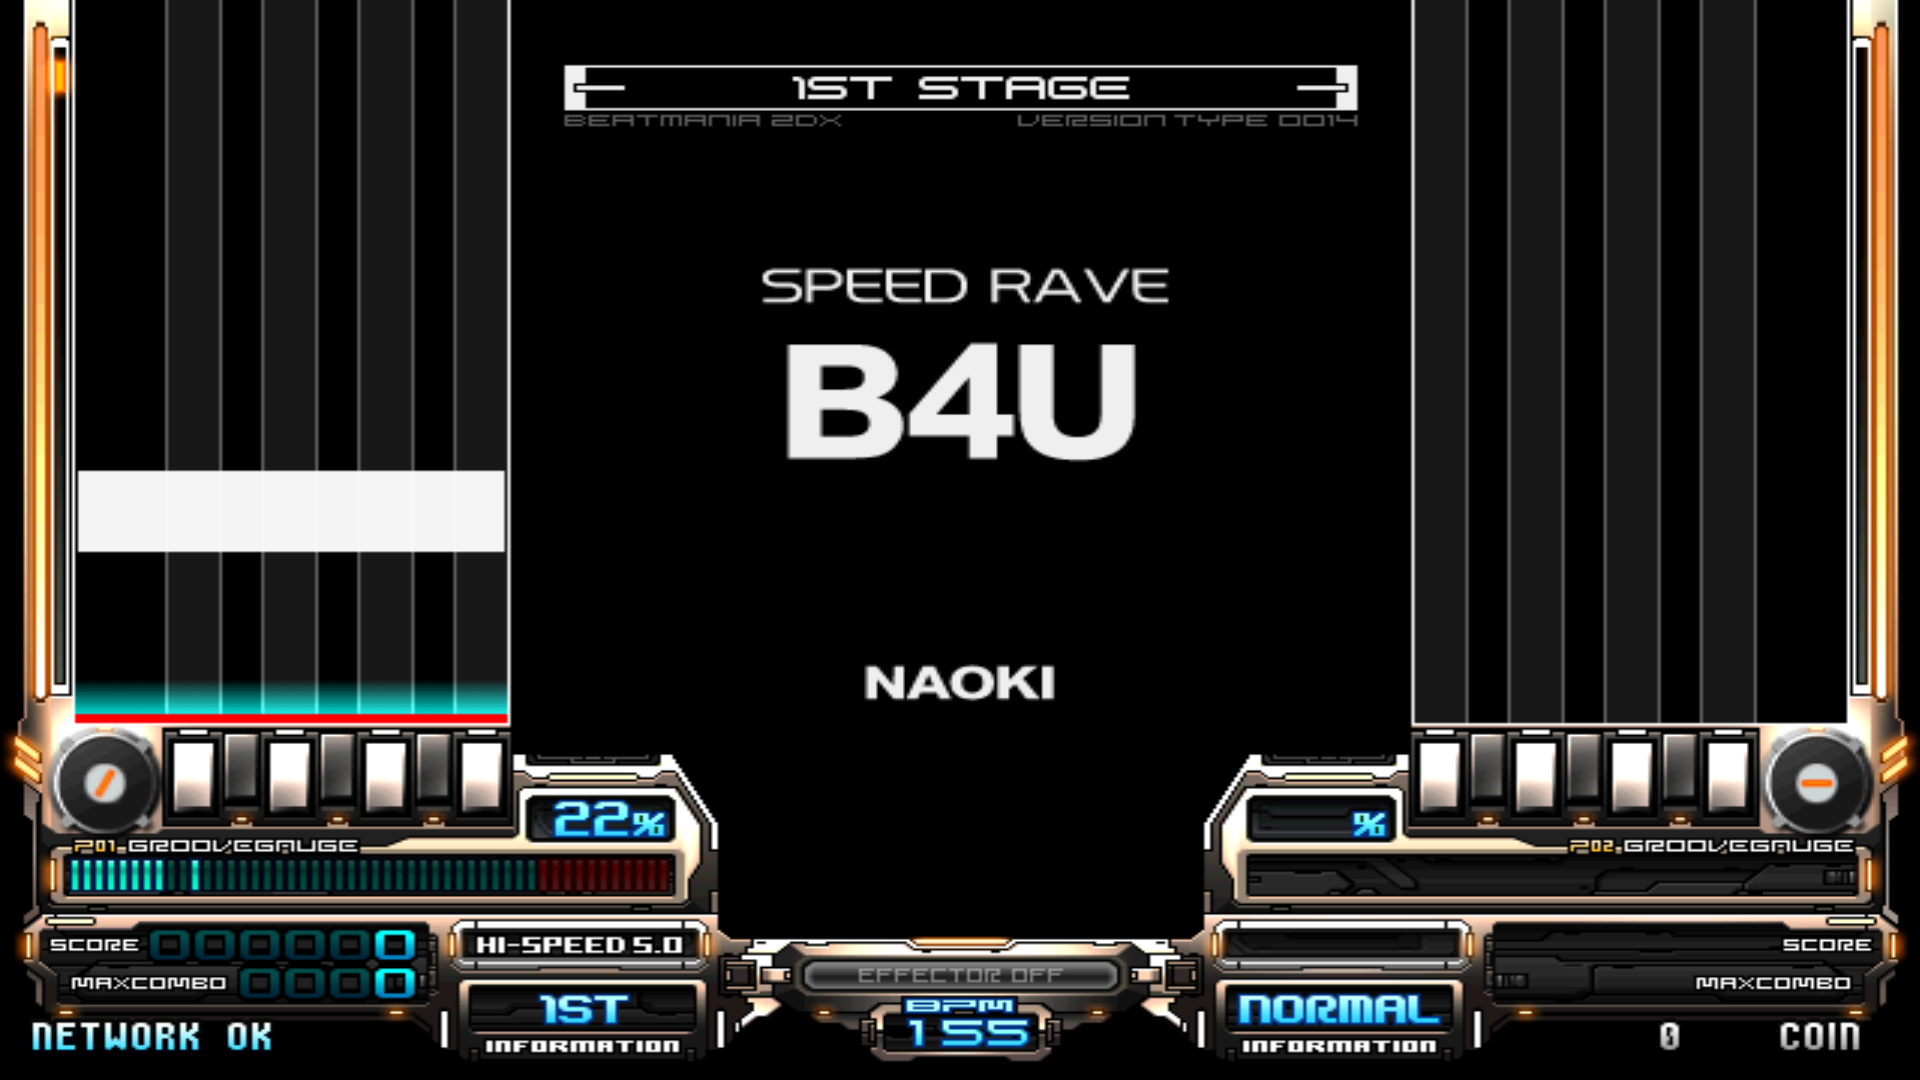
If you've followed all instructions correctly, you're now finally ready to launch the game!
First plug your controller if you have one and run gamestart.bat as Administrator.
If it's your first time running the game, you'll soon be greeted with this screen.
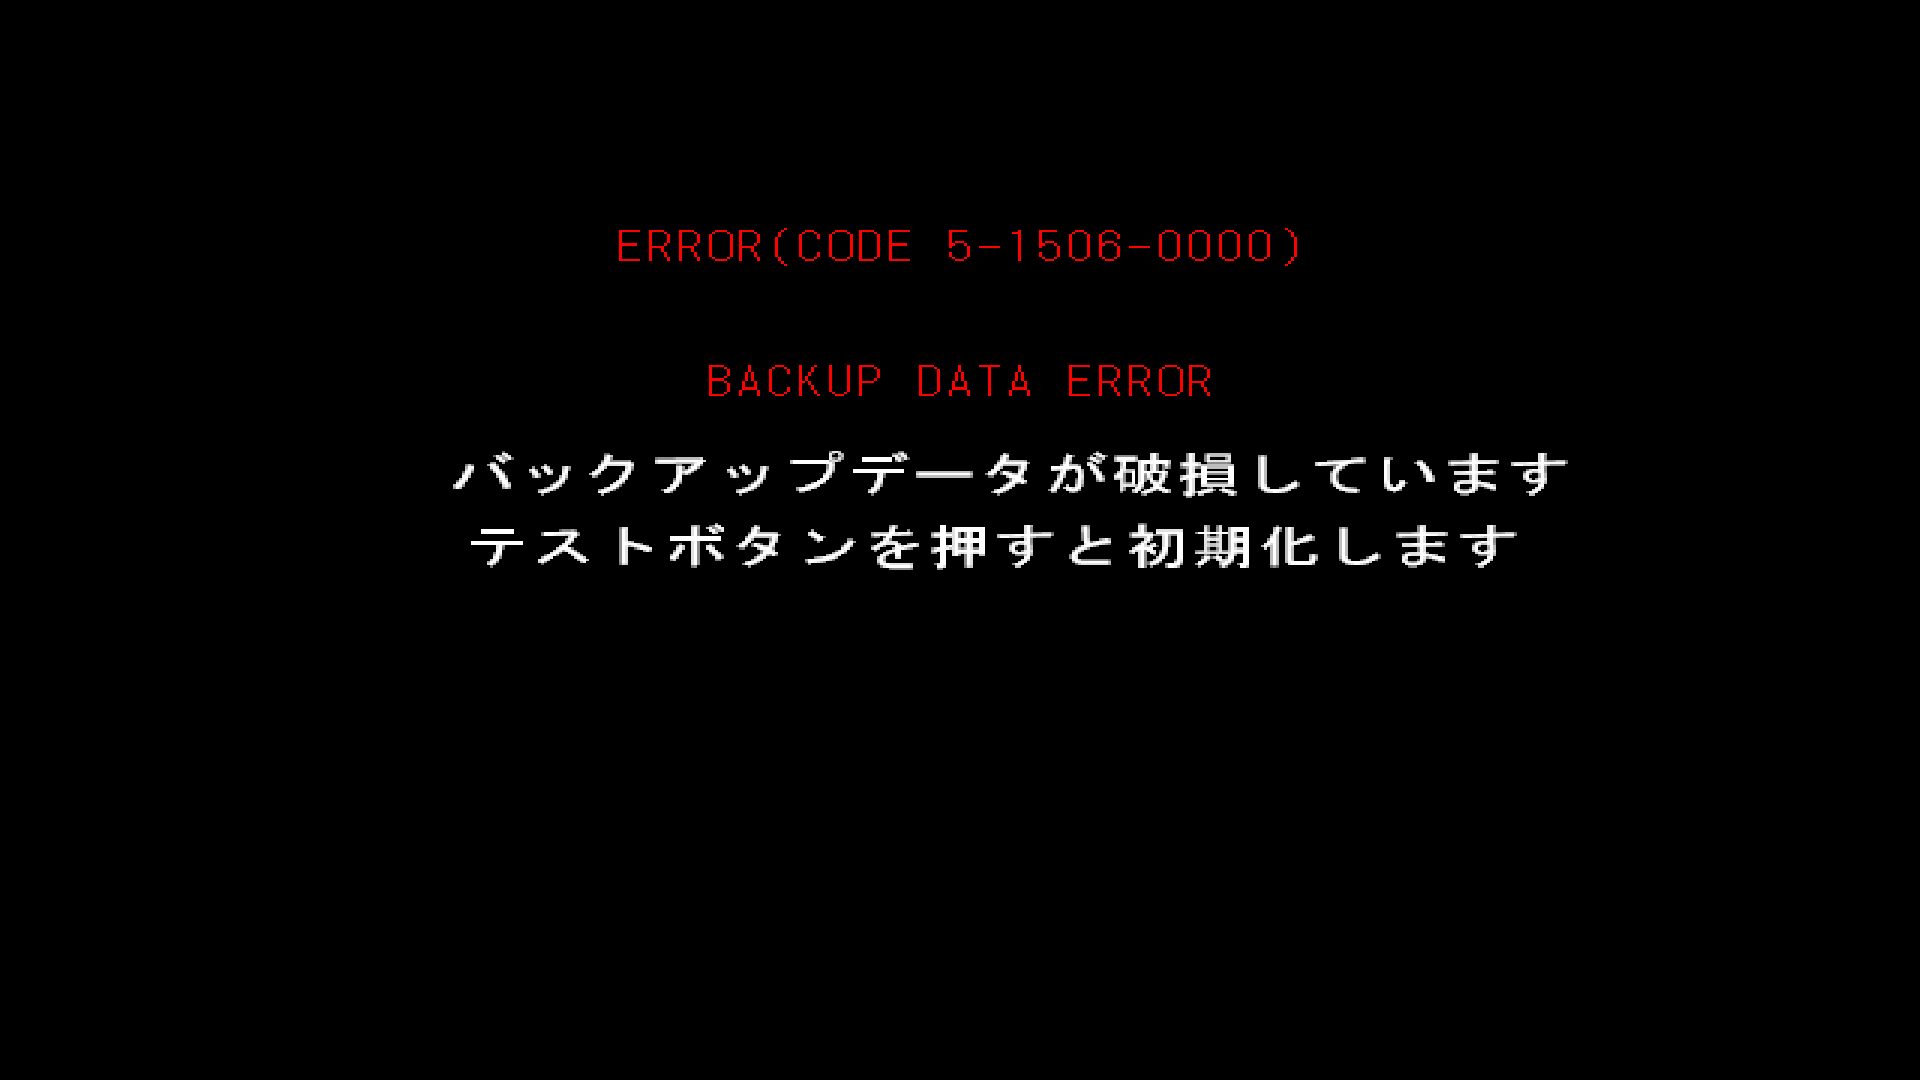
Press your Test key to initialize the backup data, a message will pop up stating it's been initialized.
If right here you get USB I/O ERROR ERROR(FM TRNS-OUT) or USB I/O ERROR ERROR(FM-DL TIMEOUT) instead of the BACKUP DATA ERROR, reboot the game and it should get fixed.
Next, you'll get another error.
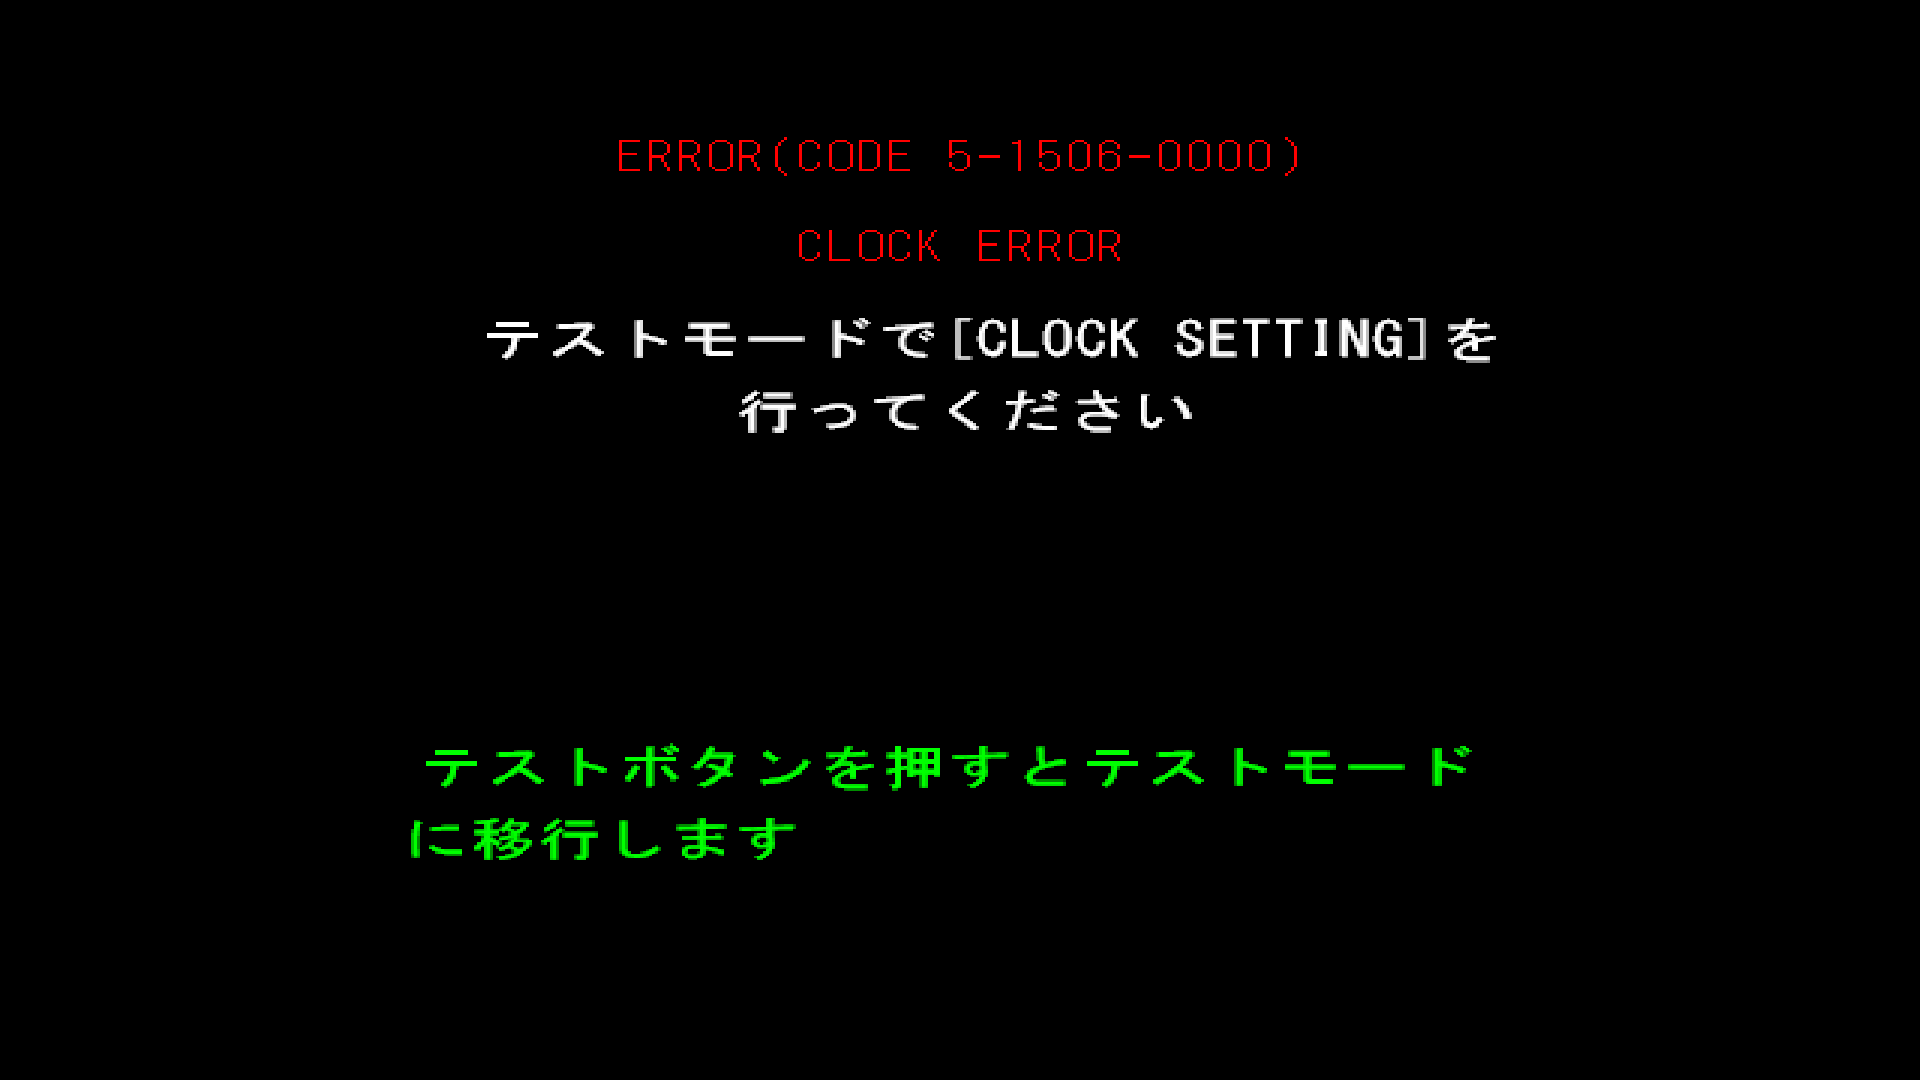
Press your Test key again and let the game run for a bit until the monitor check is complete.
You will now be taken to the service menu.
Instructions on how to navigate the menu are shown at the bottom of the screen:
- Press
1and2to go up and down - Press
6to select/execute
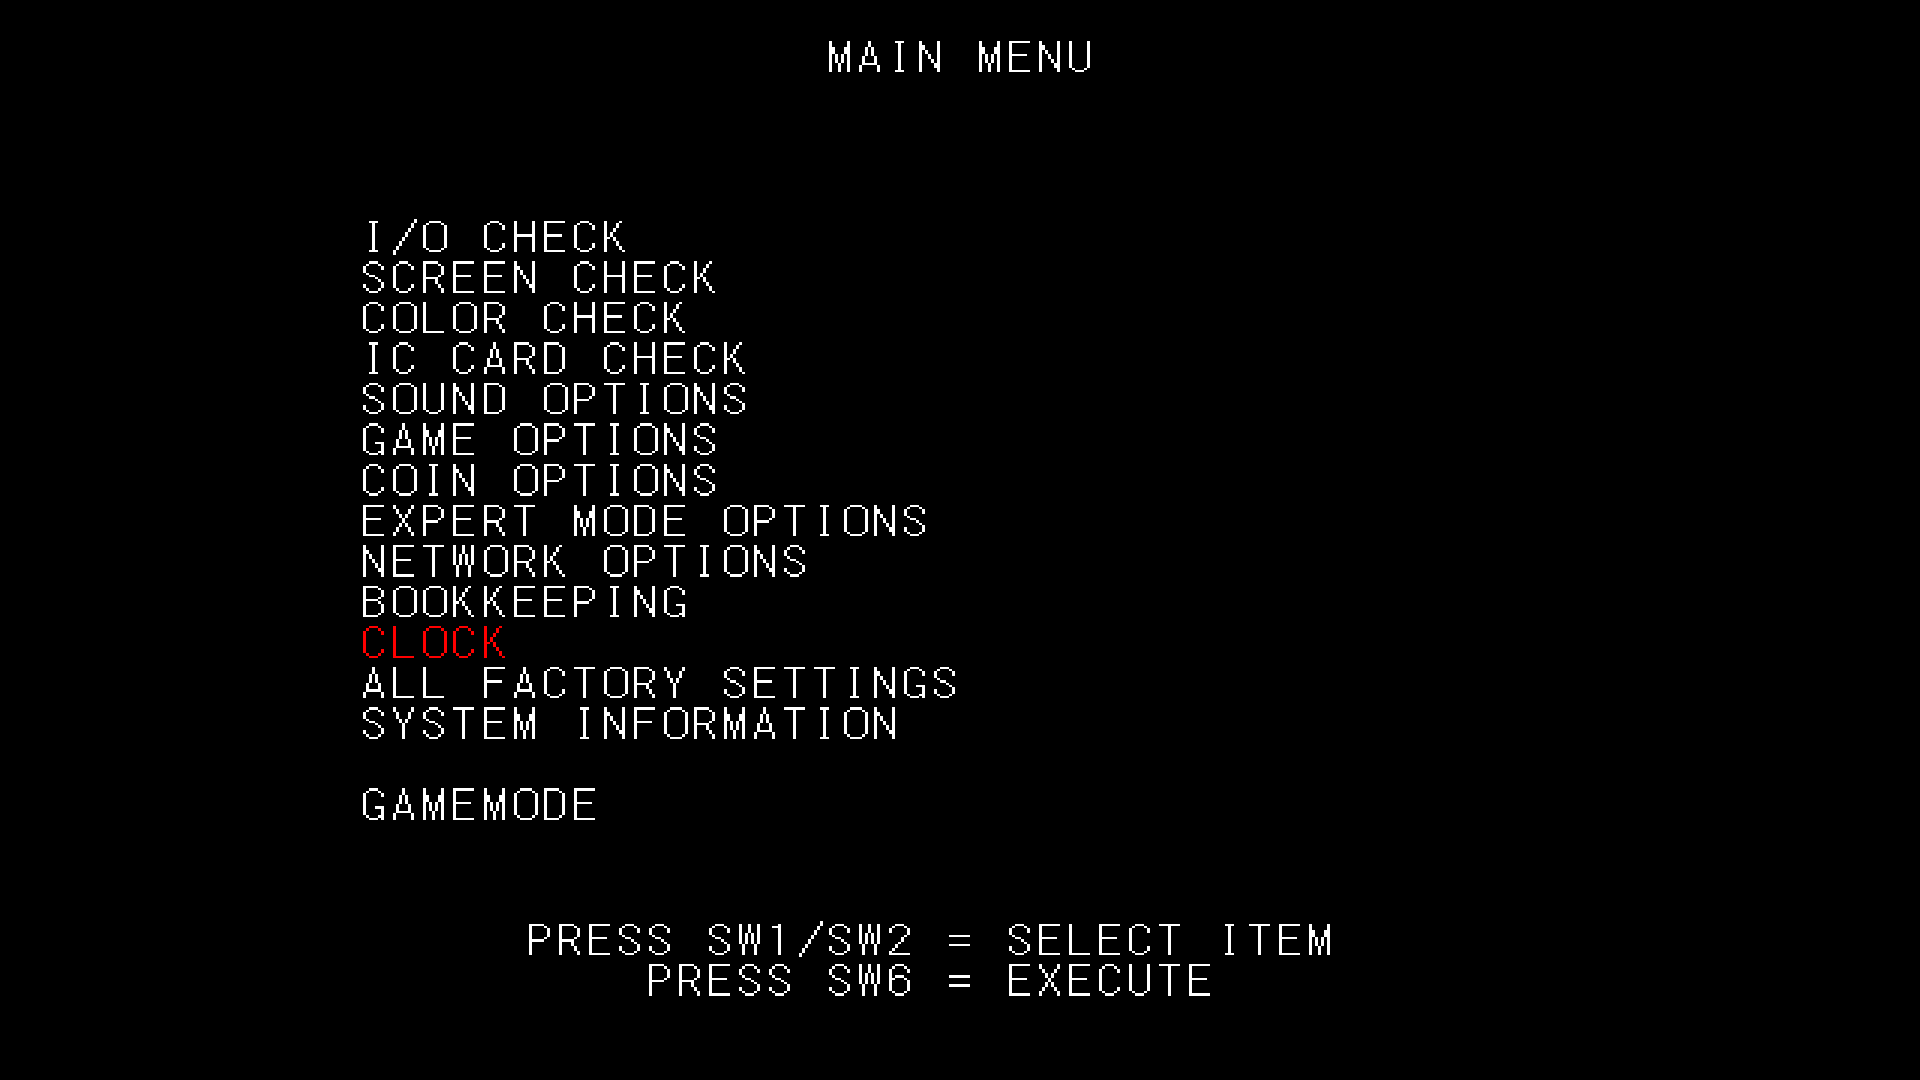
Start by going up to CLOCK.
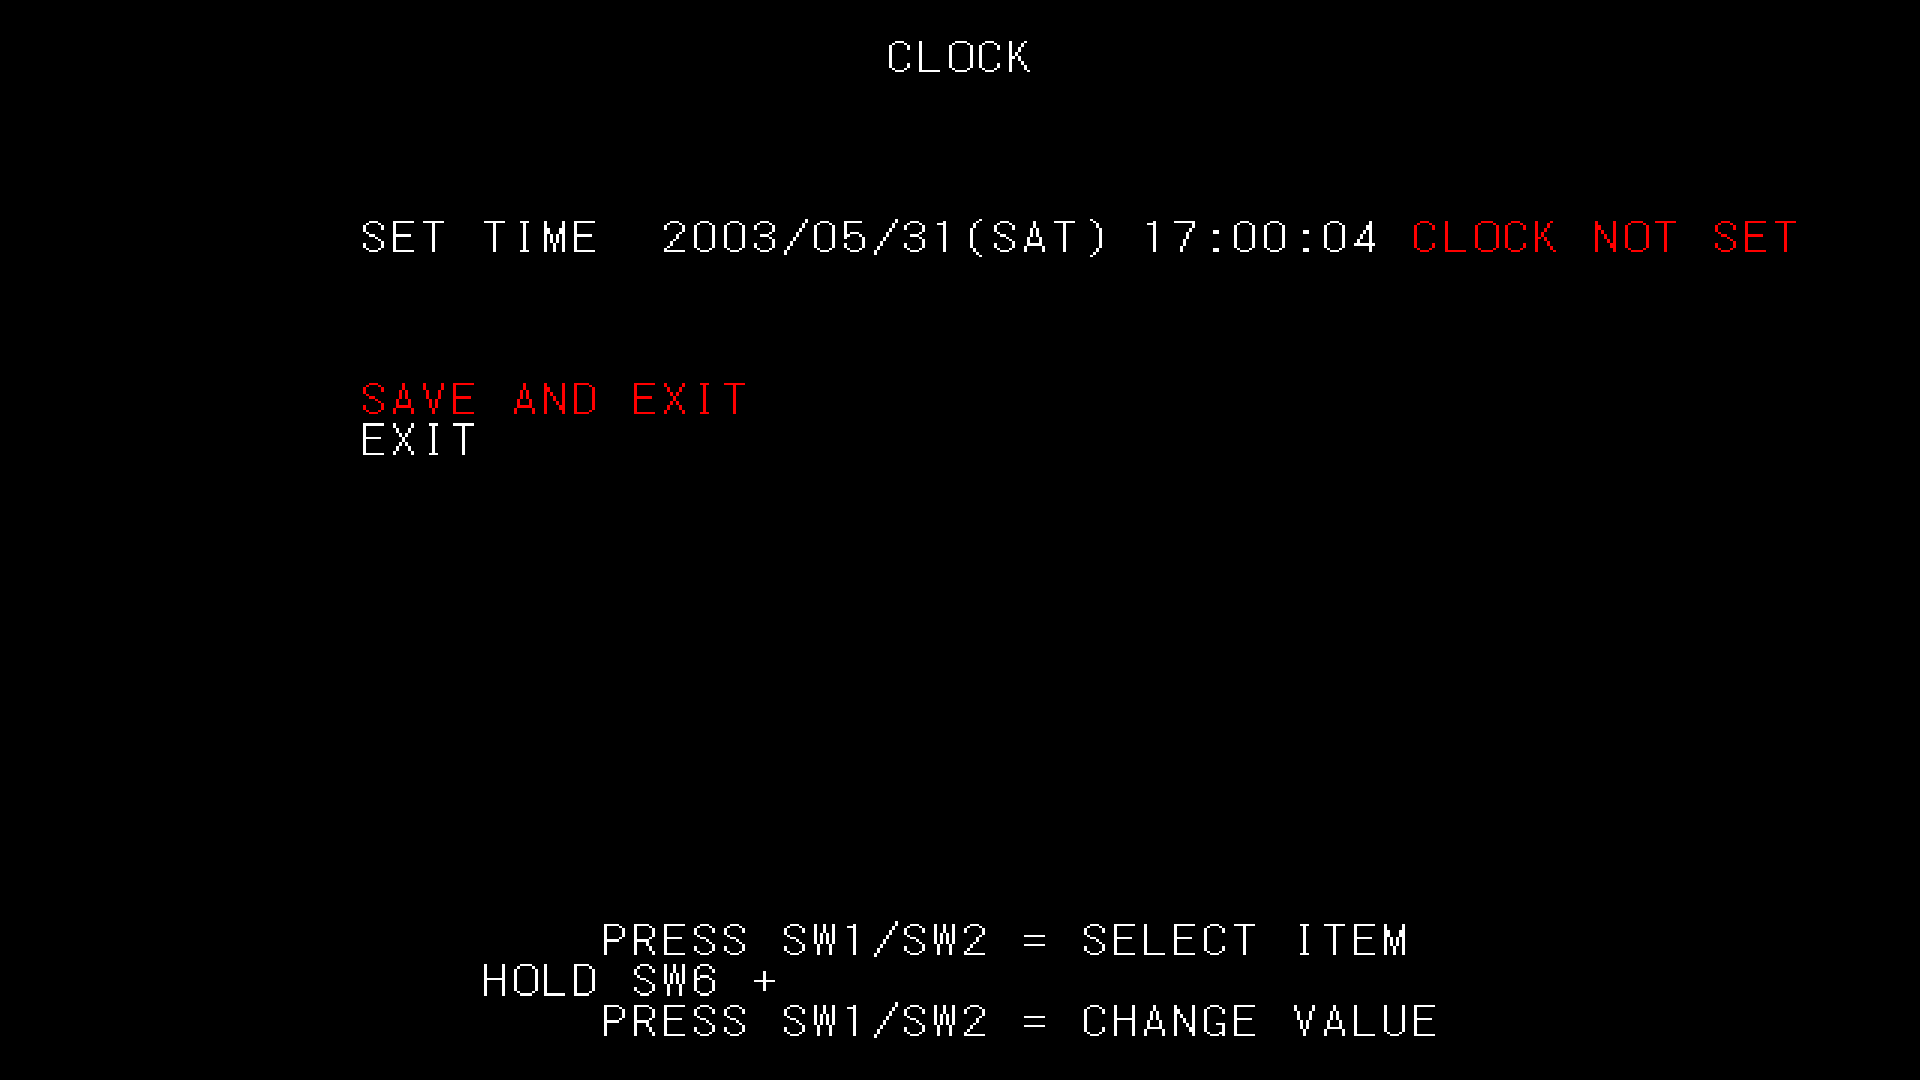
Here, simply select SAVE AND EXIT and the clock will be set.
You'll be back in the service menu.
Go to NETWORK OPTIONS then e-AMUSEMENT SETTINGS.
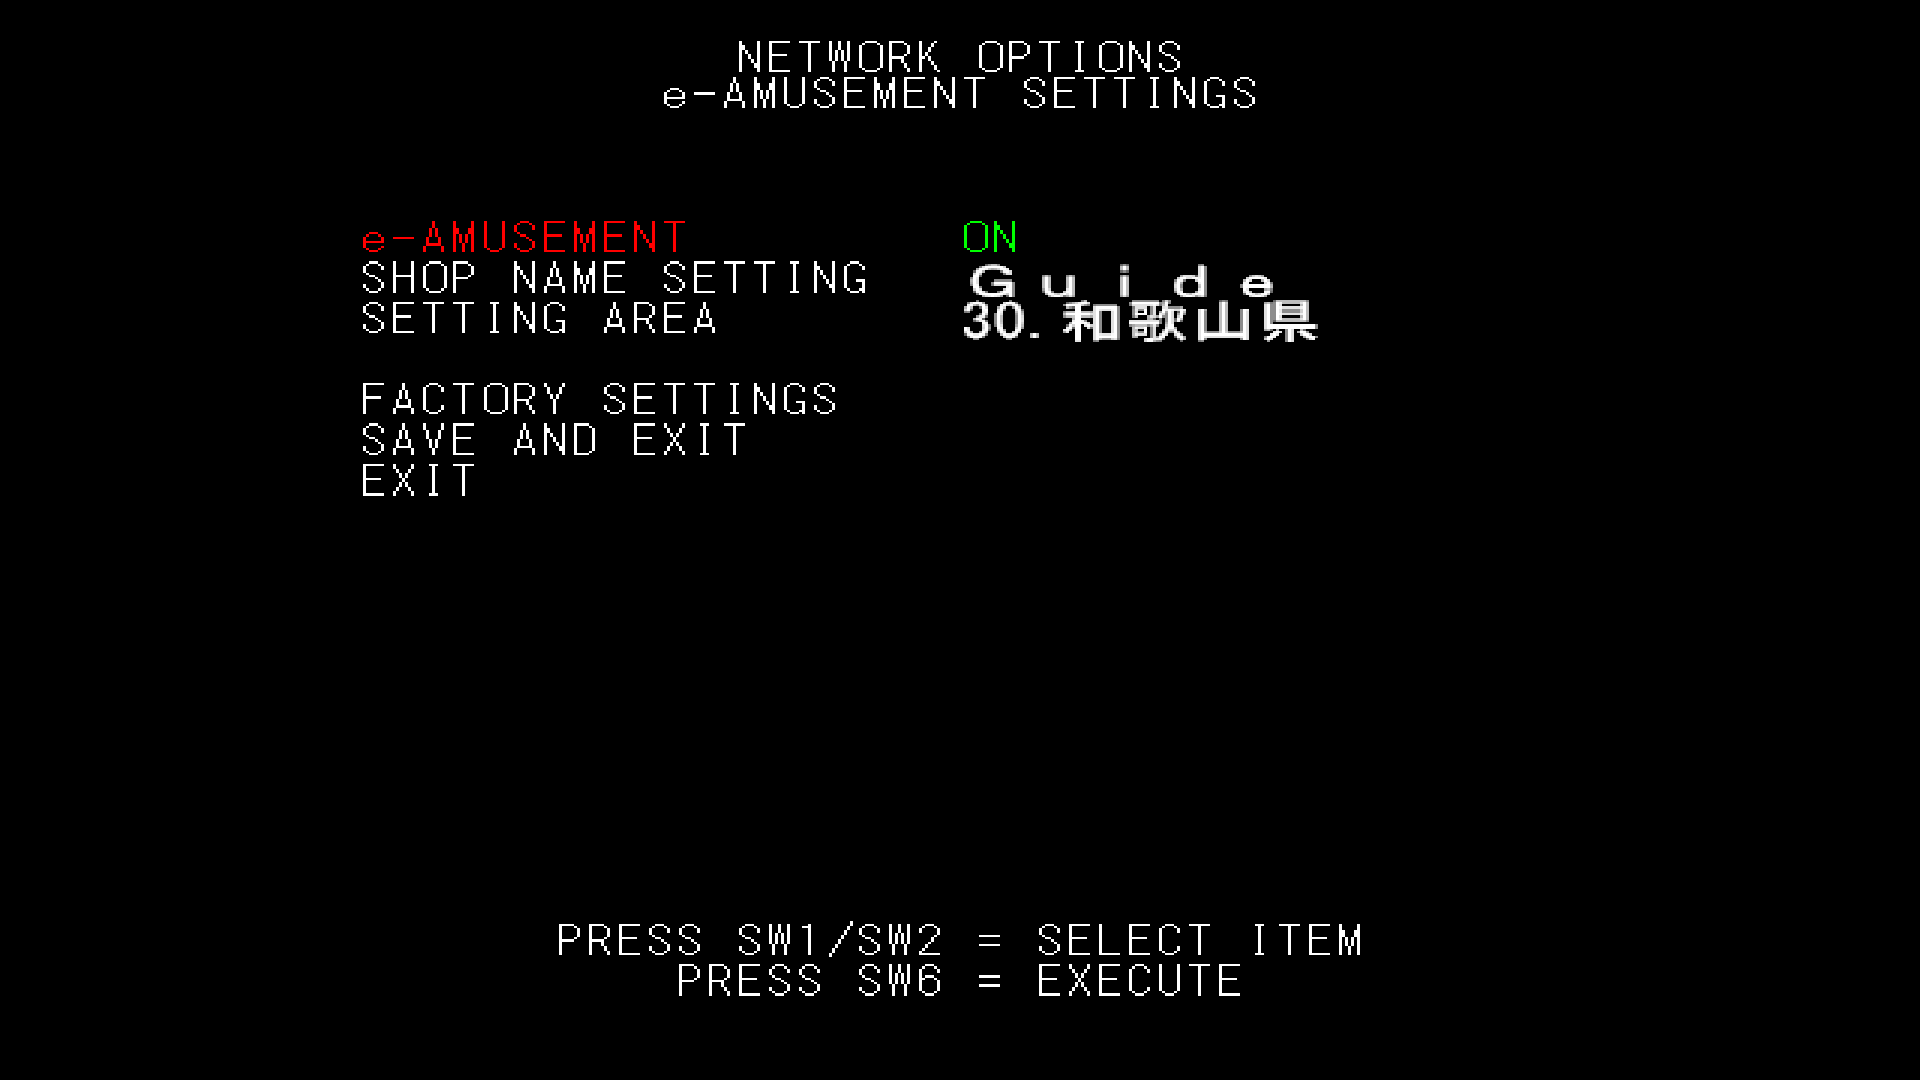
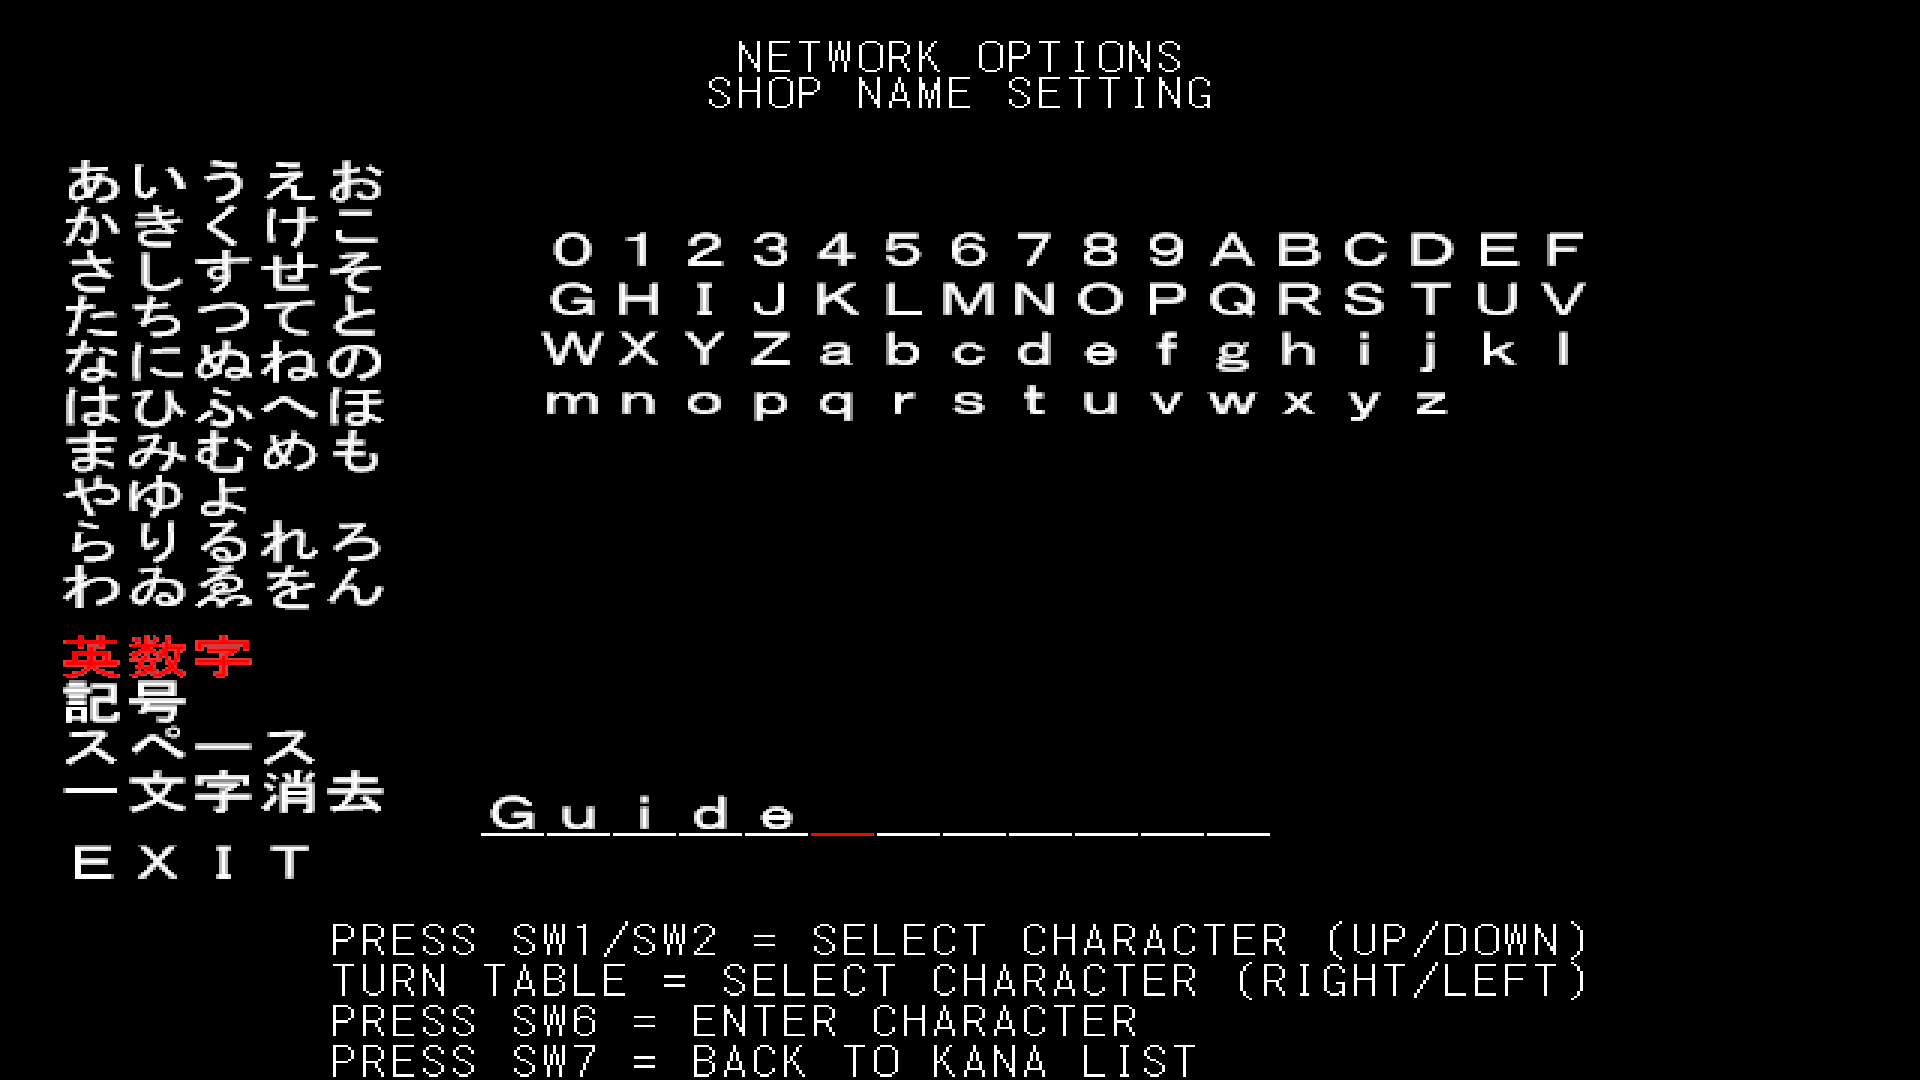
You will need to set a shop name.
- Name your shop to whatever you'd like. Again, navigation instructions are at the bottom of the screen
- Go to
EXITthenSAVE AND EXIT
Select GAME OPTIONS.
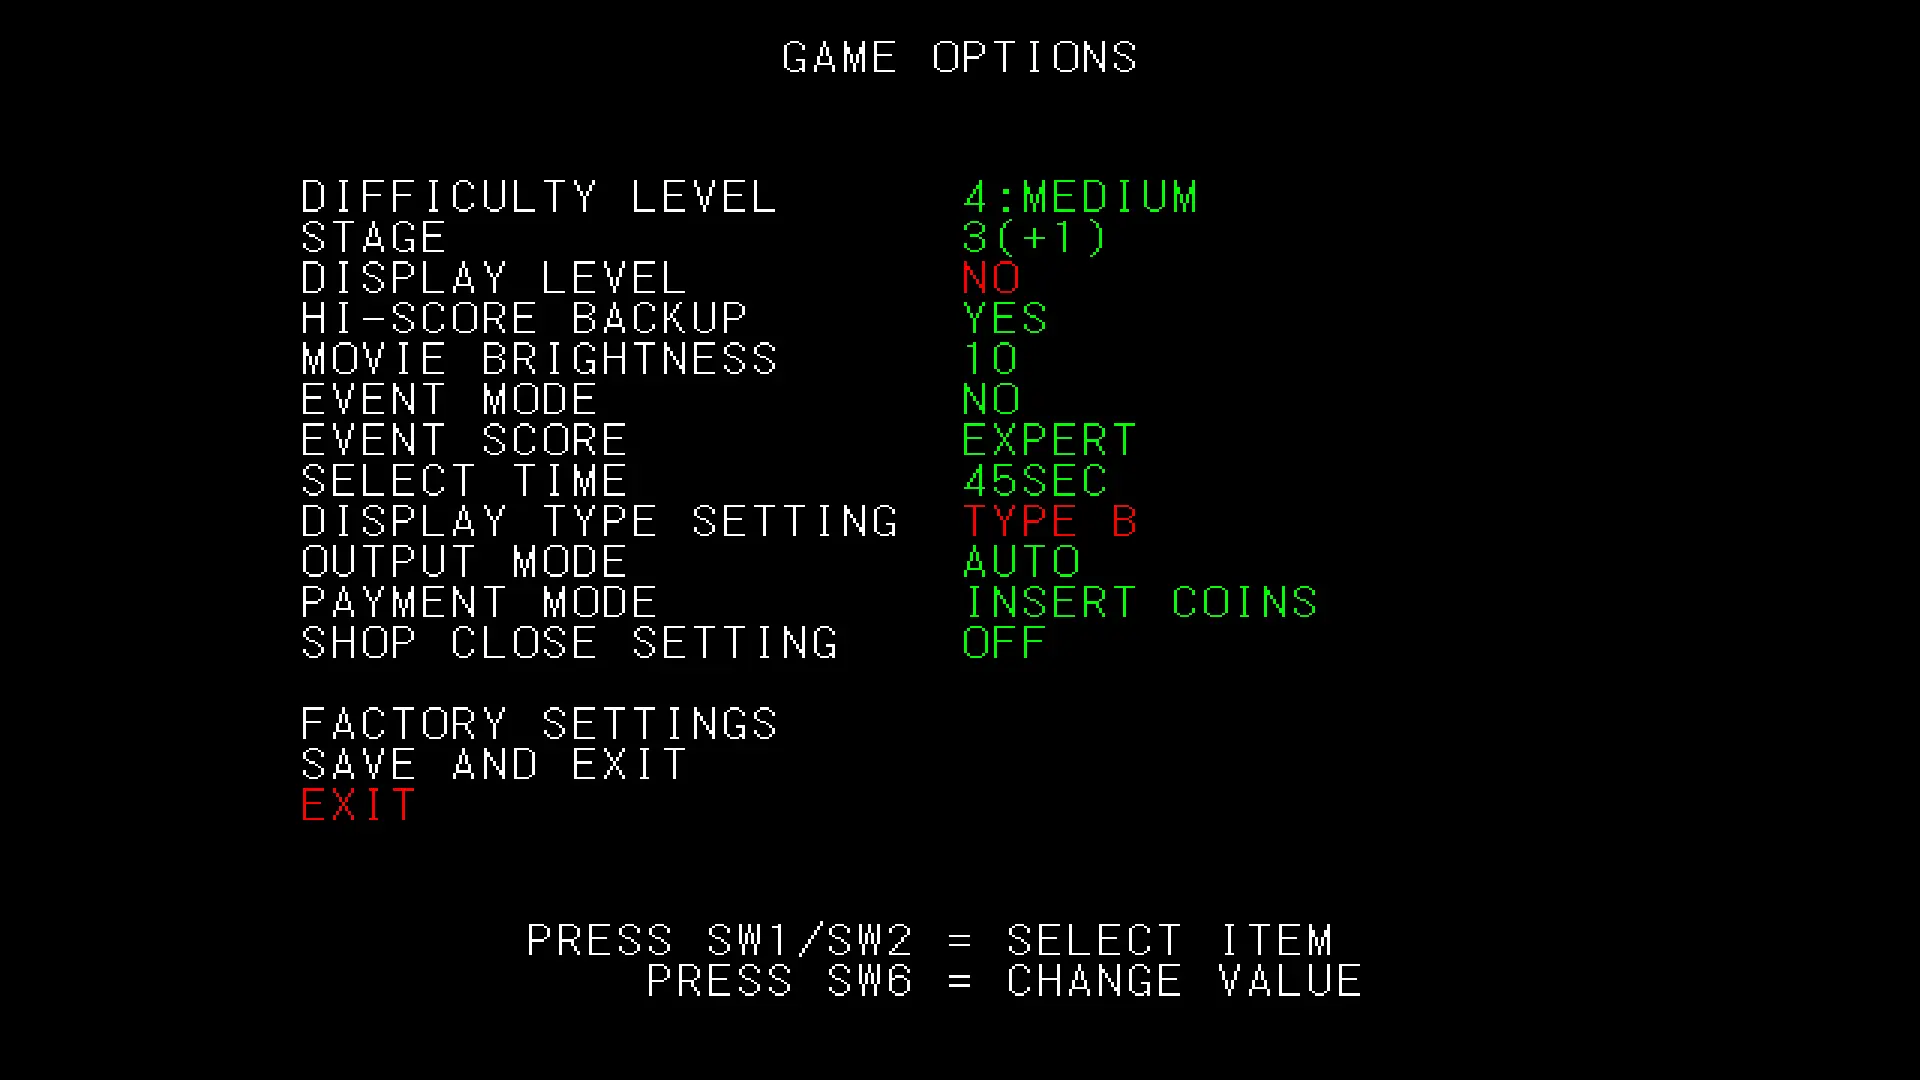
Here, you want to select a display type.
This setting affects timing offset in the song.
TYPE A: No frame offset - Intended for CRT displaysTYPE B: +1 frame offset - Intended for LCD displays
We recommend starting with TYPE B and changing this later if you encounter any issues.
- Go to
SAVE AND EXITthenGAME MODE
You're all done! The game should load up properly now. Insert credits by pressing your SERVICE key!
Help
Something's wrong?
Make sure you've followed all steps correctly and also read other relevant guides.
Still stuck? You can join our Discord community server for support!
Click on the Discord logo at the bottom right of the page.